


Seamless Airtable to WordPress Integration Guide
If you collect user data on your site, such as names and email addresses, you may have discovered that organizing all that information into something usable can be tough. This is especially true on large sites that get tens or hundreds of form submissions every day.
Airtable is an elegant solution to this problem. It takes the power of a database, the flexibility of a spreadsheet, and the ease-of-use of a modern app, and combines them all into one platform that can be tailored to your exact needs.
In this article, we’ll cover exactly what Airtable is and why you should be using it on your WordPress site. Then we’ll walk you through how to connect it to your forms so you can start collecting data today. Let’s get started!
What Is an Airtable?
Airtable is an incredibly flexible system that combines the functionality of a spreadsheet with the power of a database. The end result is a highly-customizable tool that can be applied to nearly any task you can think of.
A few examples include:
- Project management
- Customer relationships management
- Content calendars
- Client booking
In a nutshell, Airtable is whatever you want it to be. It can be used to organize information and then display it in a variety of ways, from a simple spreadsheet-style layout to calendars, Kanban boards, and gallery views.
The best part is that Airtable takes the hassle out of creating these tools. Getting advanced functionality out of a spreadsheet can be quite complex, but Airtable is designed to be simple and easy to use.
Why Add an Airtable to Your WordPress Site?
There are a lot of ways you could incorporate Airtable on your WordPress site, but the most common use is to collect and manage data about your visitors. That information can come from either user surveys or signup forms.
Most websites include signup forms of one kind or another, for email newsletters, notifications, product trials, user account creation, and so on. By connecting these forms to Airtable, you can have the information automatically aggregated into a spreadsheet that organizes names, email addresses, product preferences, and more. This is extremely powerful for content planning, enabling you to tailor posts and marketing materials to your audience.
Airtable can also be used to aggregate and display survey results. This lets you easily get a birds-eye view of your user base, and the data can be used to inform product planning, relationship management, and more.
A Guide to Integrating Airtable Into Your WordPress Site (In Five Easy Steps)
To get Airtable set up on your WordPress site, you’ll need a forms plugin that can integrate with a service like Zapier, which connects two apps or services. The Gravity Forms plugin is a popular choice.
Then you’ll just create your form and use Zapier to send the data to Airtable. Let’s walk through how the process works.
Step 1: Integrating Airtable with Your WordPress Contact Form
We’ll use Gravity Forms for our demonstration, since it’s such a popular and easy-to-use tool. First, you’ll need to purchase and download the plugin. Then head to your WordPress dashboard and navigate to Plugins > Add New.
Click on Upload Plugin, and choose the Gravity Forms file you just downloaded. Don’t forget to activate it once it’s installed!
Next, you need to create your form. We’ll use a basic contact form as our example. Navigate to Forms > New Form in the sidebar, then give it a name and click on Create Form.
Next, select the field options you want from the list on the right:
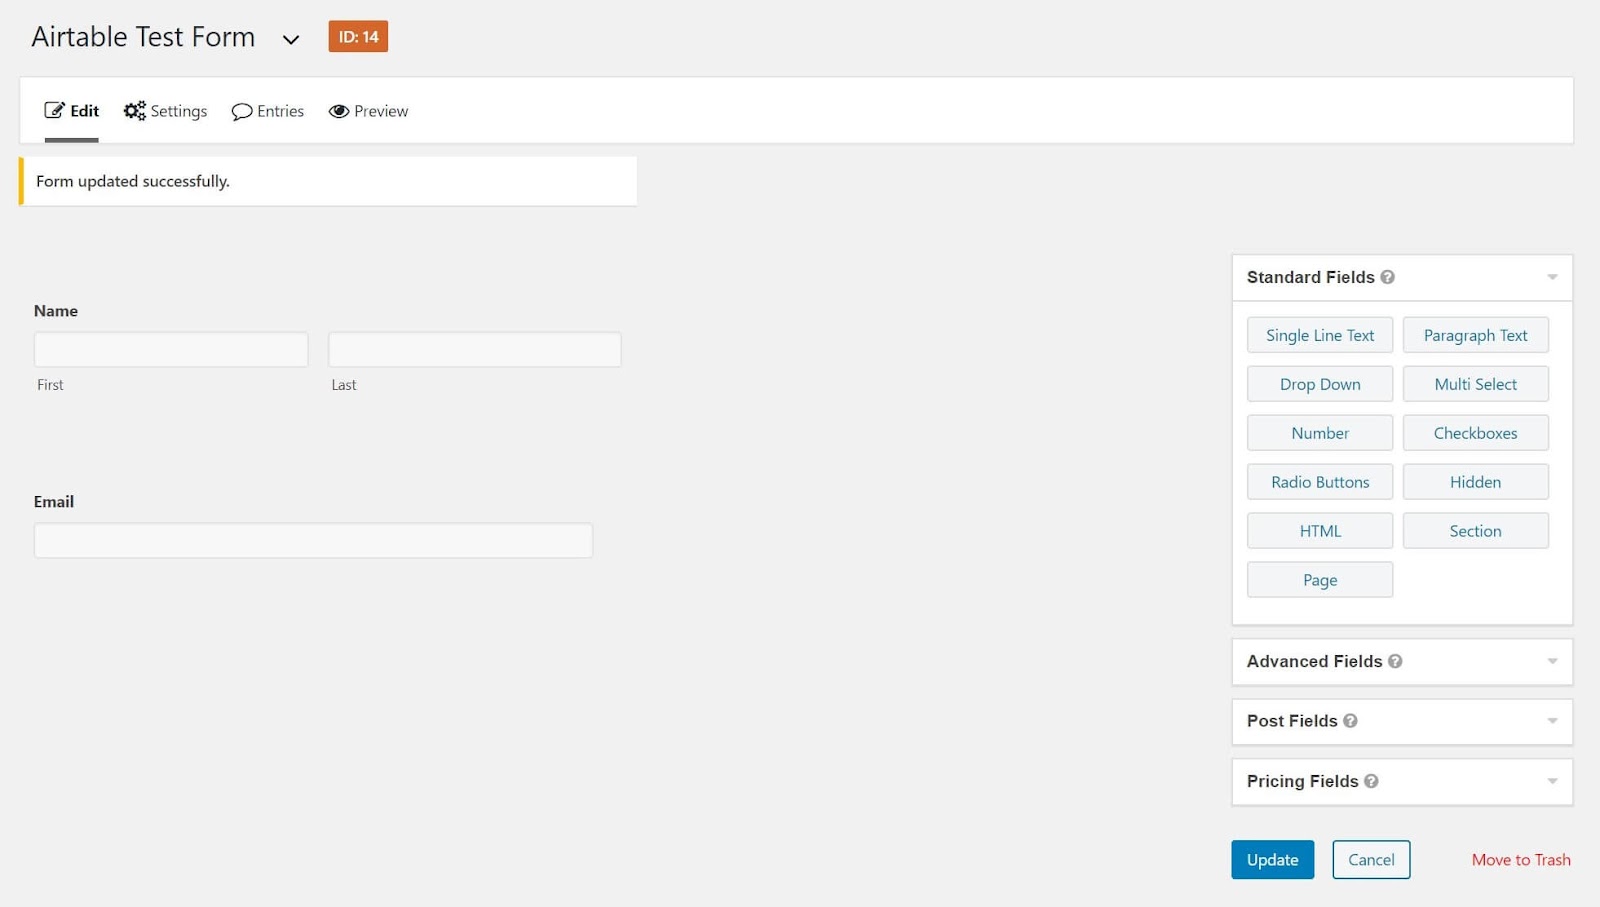
When you’re done, click on Update to save your form. Next, open up the page in the WordPress editor and add a new Forms block:
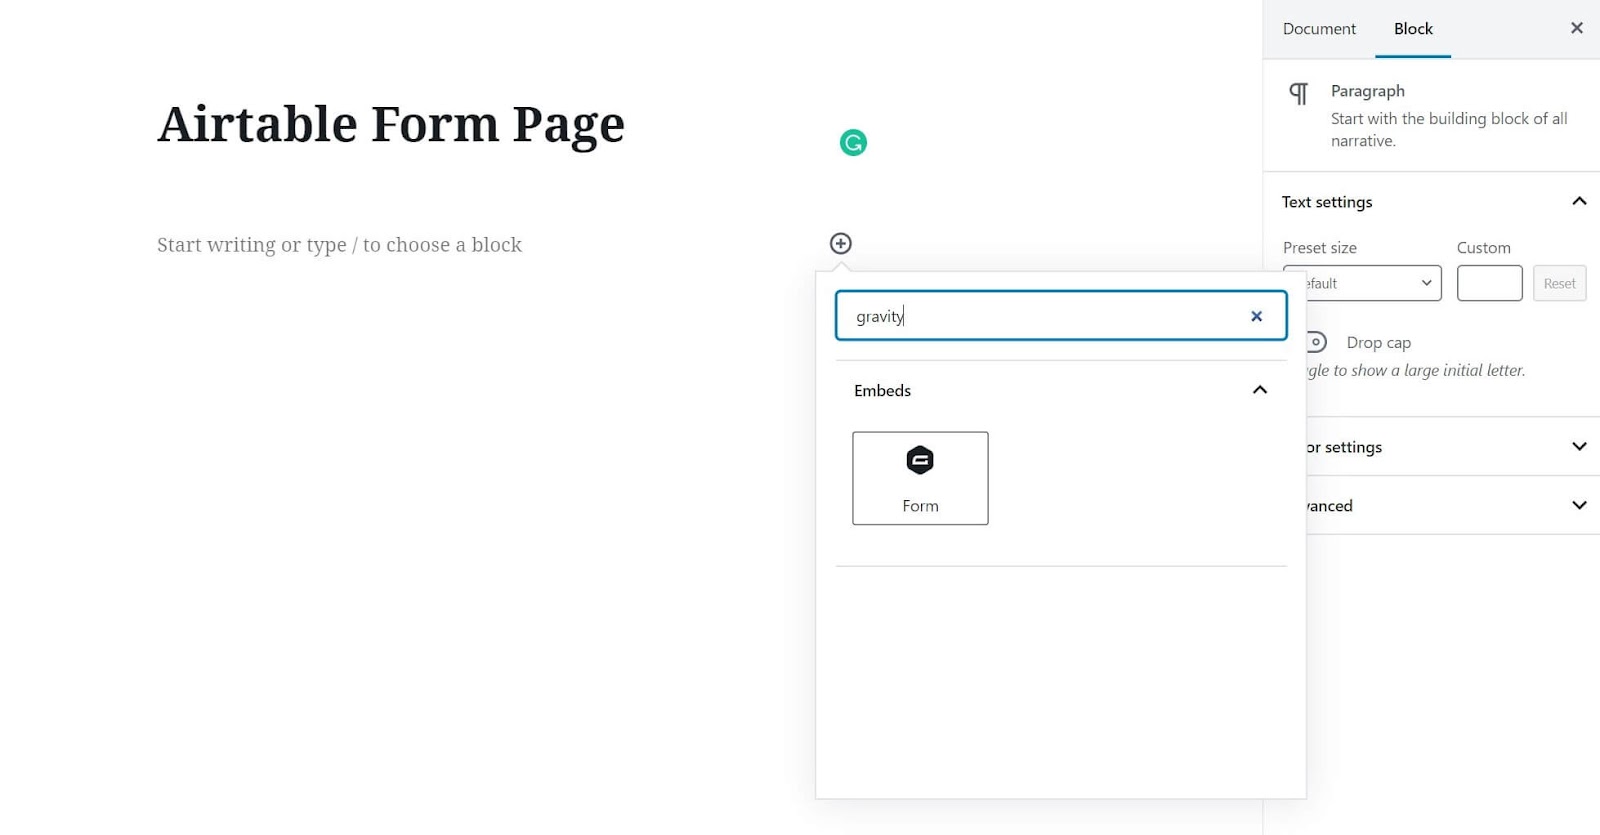
Select your newly-created form from the drop-down list and you’ll be all set. Make sure to update the page as well.
Step 2: Enabling the Gravity Forms Zapier Add-On for Airtable to WordPress Integration
With your form created, the next step is to connect Zapier to the form and your Airtable account. The first thing to do is make sure that Zapier integration is turned on for Gravity Forms.
To do that, navigate to Forms > Add-ons. Scroll all the way down until you see the Zapier add-on (they’re in alphabetical order):
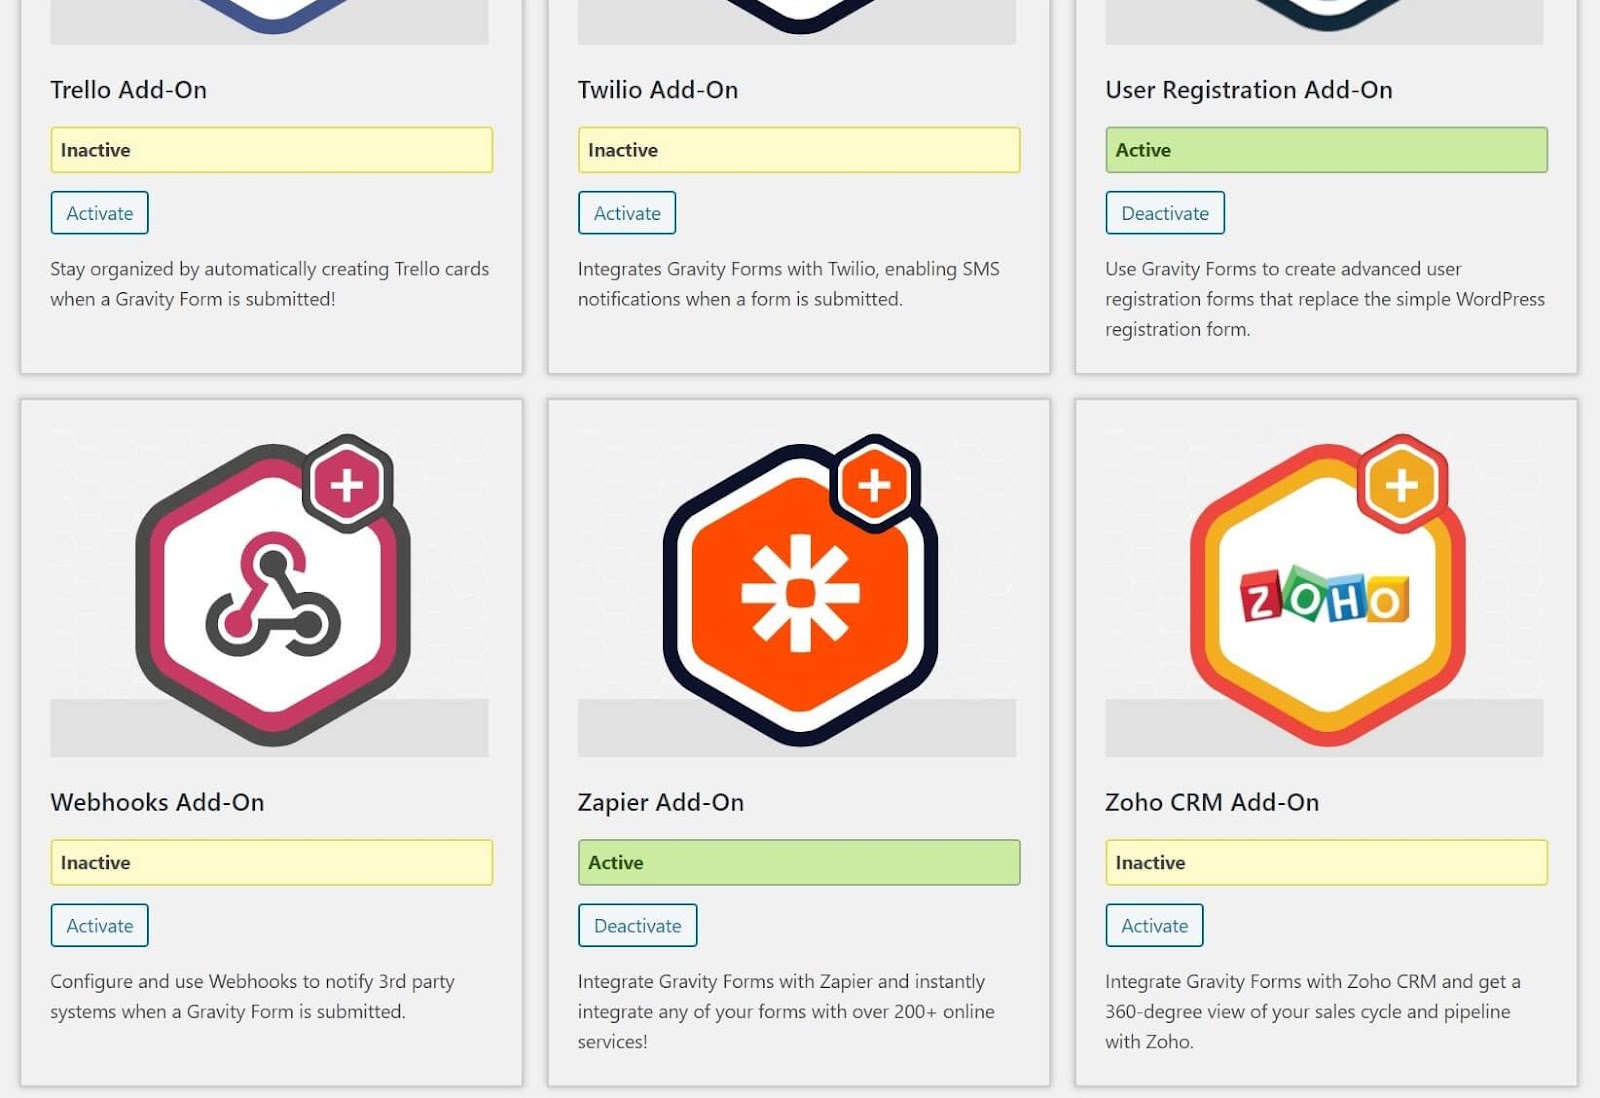
If it’s not active, click on Activate.
Step 3: Integrating Your Airtable API Key with WordPress
Next, you’ll need to set up an Airtable account. There’s a free trier as well as several premium options, so feel free to choose the plan that fits your needs.
Then, head to your Airtable account page and click on the Generate API key button:

Copy and paste that key somewhere safe, as you’ll need it shortly.
Step 4: Create a Zapier ‘Zap’ to Connect Airtable to WordPress using Gravity Forms
At this point, you’ll want to create a Zapier account if you don’t have one already. Then you can head to your account settings page and select Make a Zap. In the first section, type in “gravity” to pull up Gravity Forms:
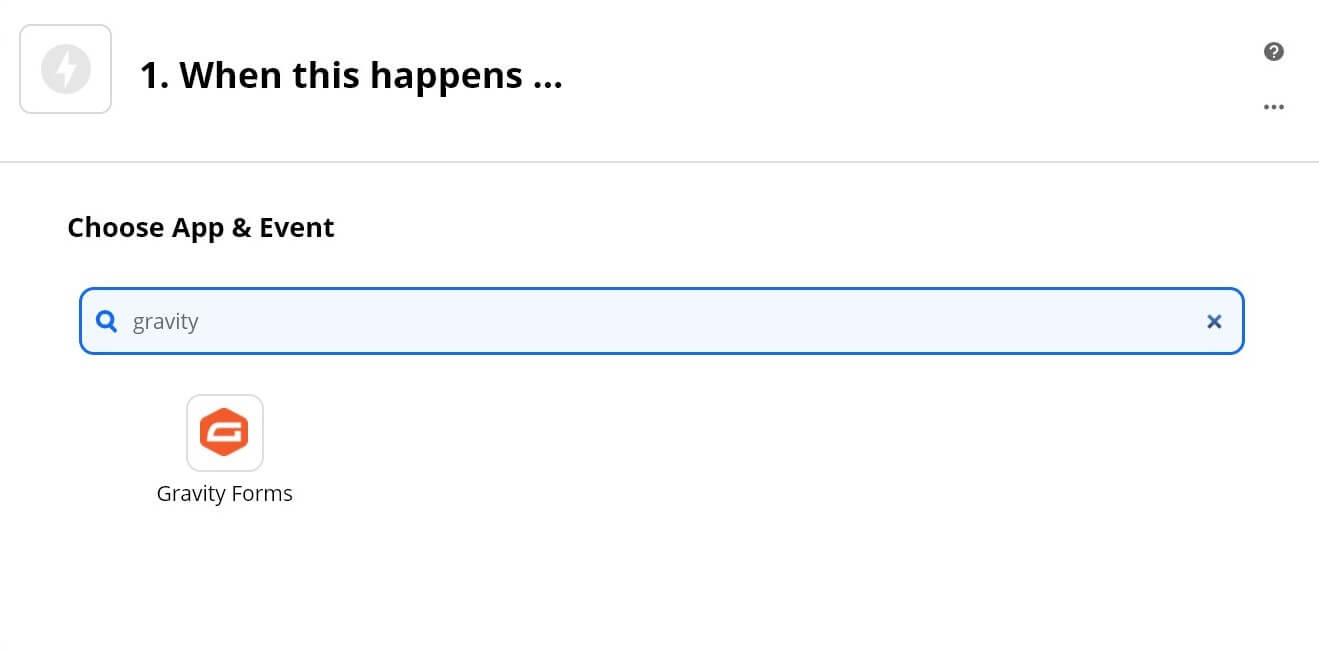
Select the Zap and click on Continue. You’ll be given a URL that you need to paste into your Gravity Forms form from Step 1.
So head back to your WordPress dashboard, select Forms from the sidebar, and find your new form. Hover over it and click on Settings, then select Zapier from the list:
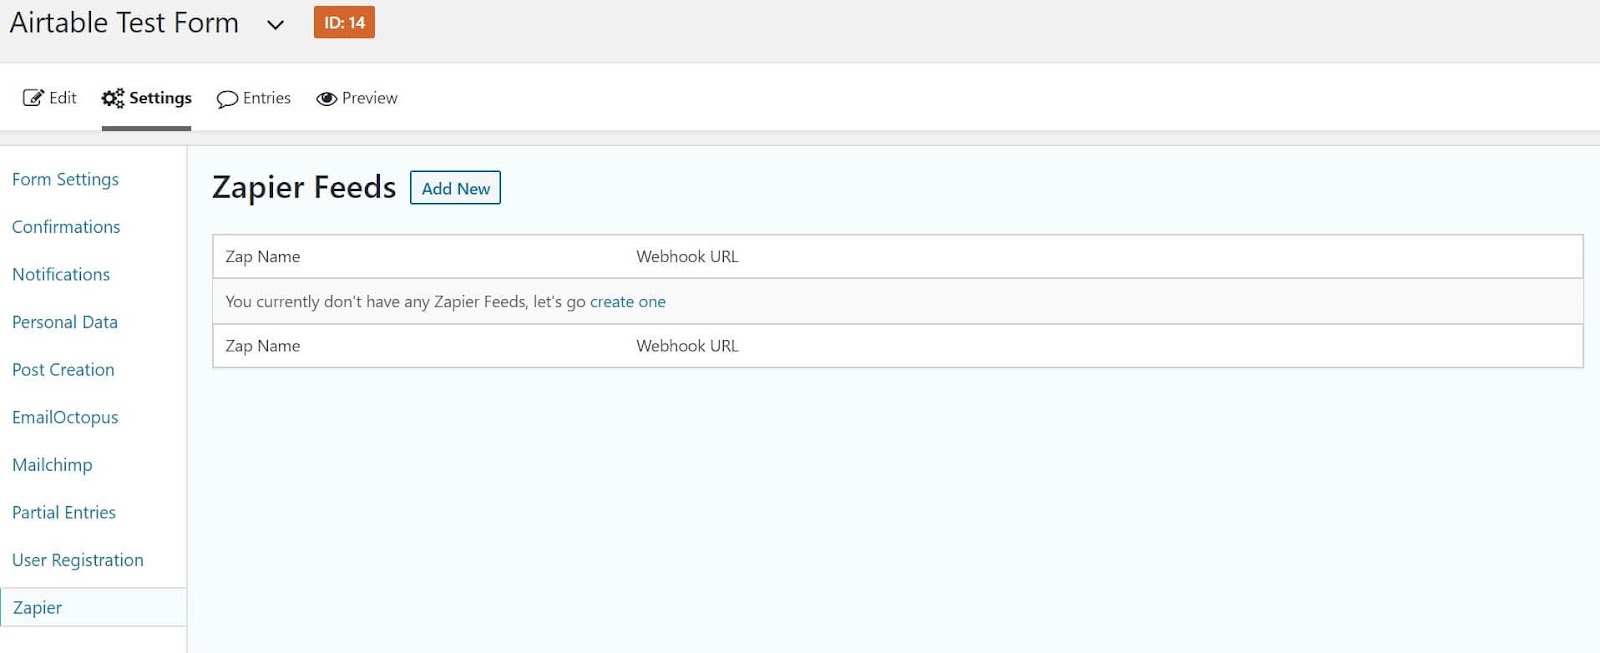
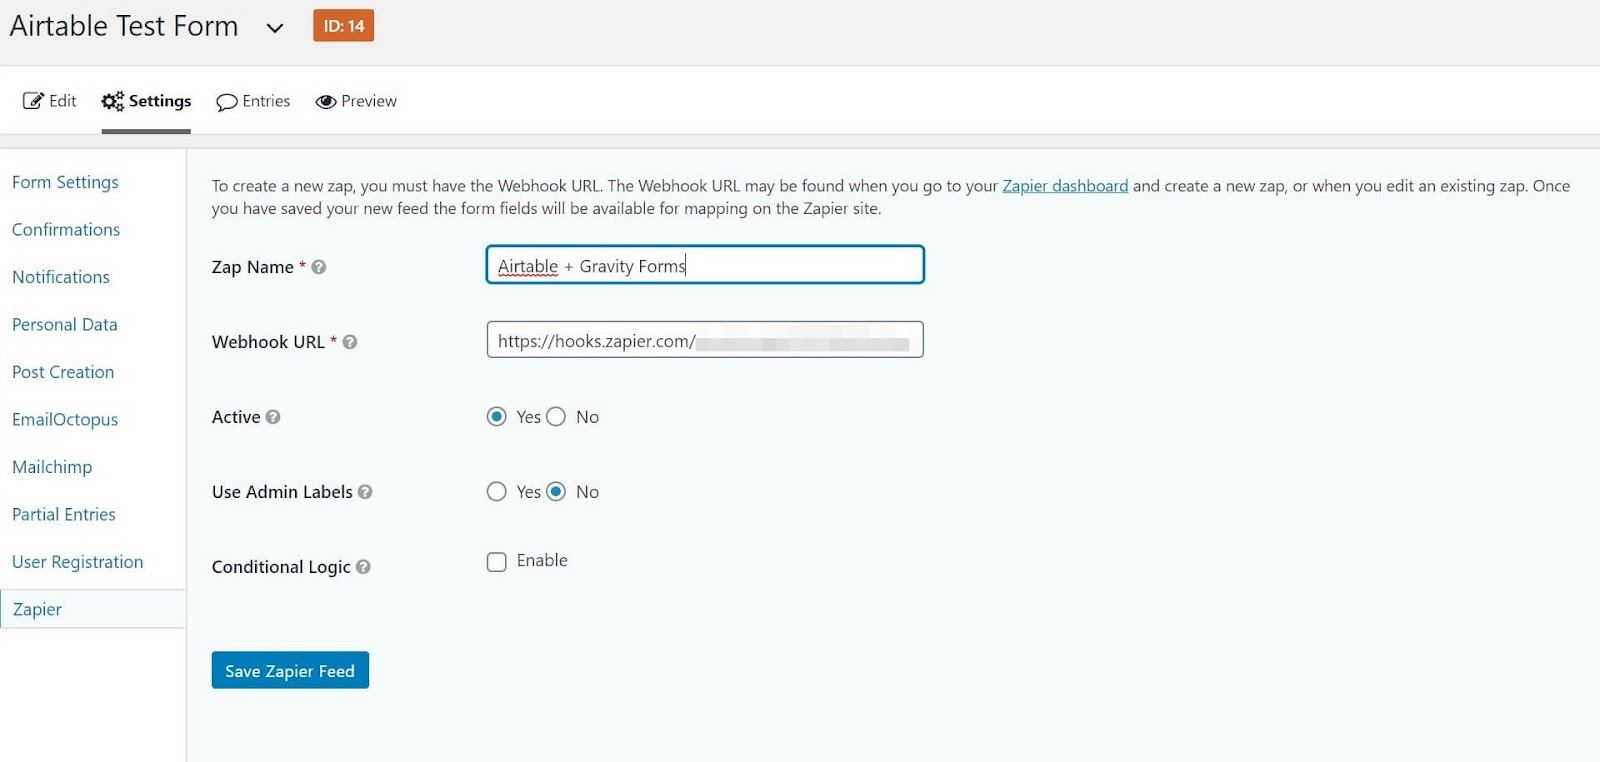
Next, click on Add New. Enter the name of your Zap and paste in the URL you were given. Make sure the Active toggle is set to “On” as well. Then select Save Zapier Feed:
At this point, you can head back to the Zapier Zap settings. Click on Continue and follow the prompts, and the app will test your connection. If the test passes, you can move on to adding Airtable to the Zap.
In the Do this… section, type in “Airtable” and select it from the list. Then choose Create Record from the three options:
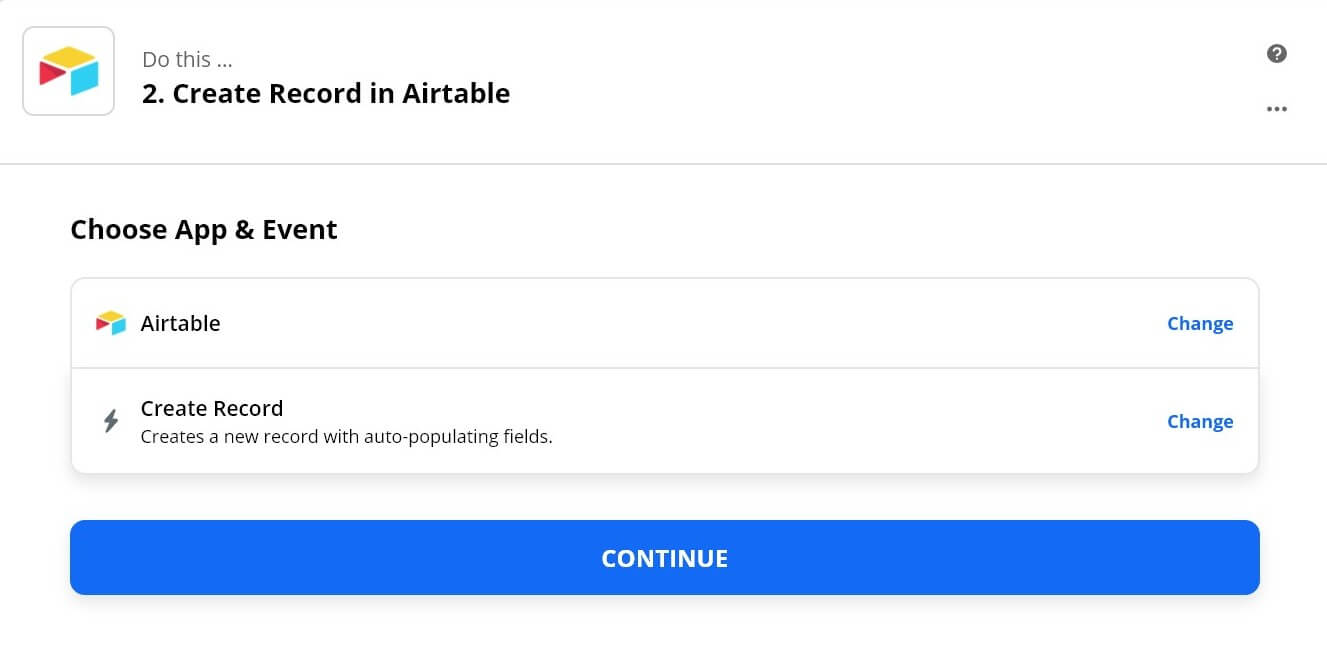
Click on Continue, and hit Sign in to Airtable. There, you’ll paste the API key you copied earlier. When you’re done, select Continue again.
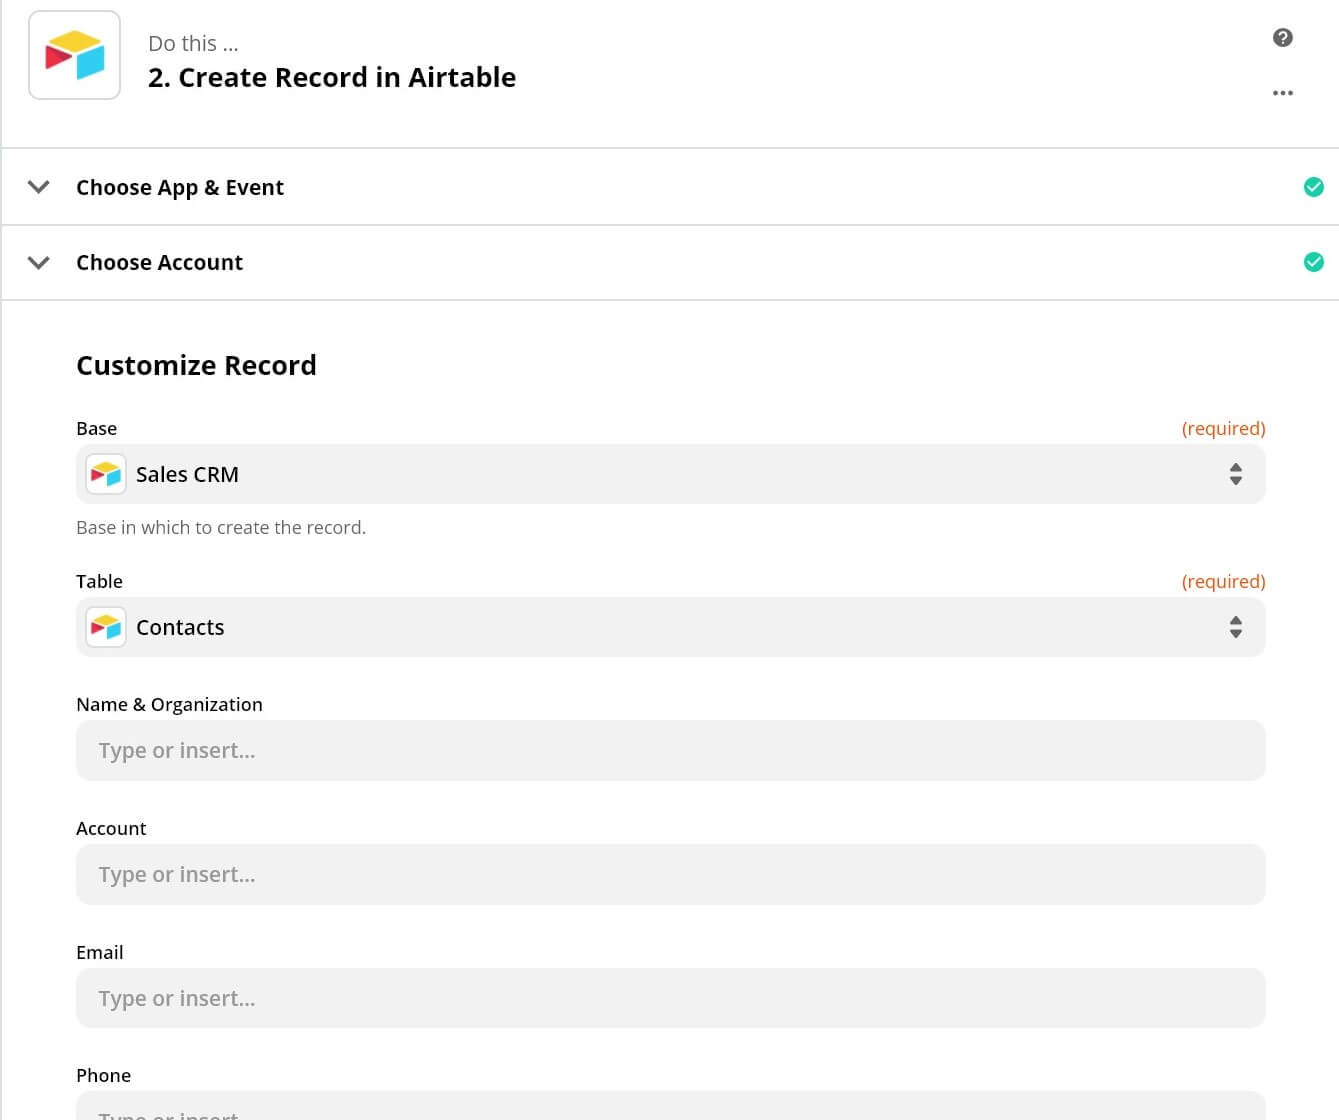
Next, you’ll need to choose the ‘Base’ and ‘Table’ you want the form data to go to in Airtable. For this example, we’ll choose “Sales CRM” and “Contacts”:

Next you need to test the Airtable integration. Click on the fields that correspond to your form and enter some test data. Then select Test and Continue:
If the test is successful, you’ll finally have the option to activate your Zap. Click Turn on Zap:
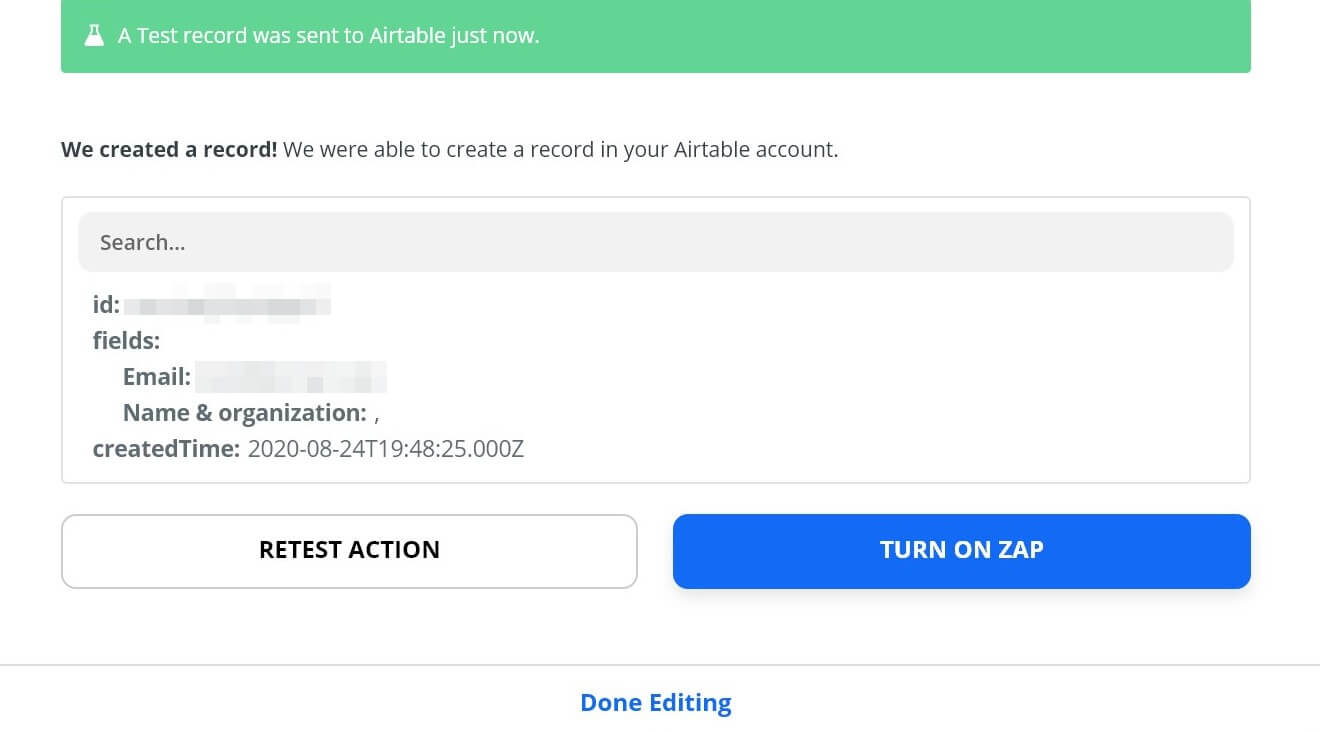
That’s it! Now your Gravity Forms form is connected to Airtable via Zapier. Any data entered in the form will be sent to your Airtable account.
Step 5: Testing Airtable with your WordPress Form
Before taking your form live, it’s a good idea to test it yourself to make sure everything works as expected. Head to the page where your form is located, enter some test data, and then check your Airtable account to make sure the information shows up where you need it.
With that, you’re all set. You now have a simple contact form that will send any data entered to Airtable, which you can then use however you like.
Customize Your Site with WP Engine
If you need an elegant, customizable way to capture and organize data from your site, Airtable might just be it. By connecting this solution to your forms, you can easily gather and organize information to inform your marketing, development, and more.
If you need even more customization options, WP Engine can give them to you. We offer the best resources on the web for users and developers, and our WordPress hosting plans can help you deliver an incredible digital experience to your customers!