Get Started


Key Takeaways
Poor navigational features can hurt usability and accessibility. Ensure users can easily access content to reduce bounce rates and keep visitors engaged.
Creating drop-down menus in WordPress enhances user experience. Economize screen space and organize content effectively for better navigation.
Customize menu structure and design with CSS for a unique look. Utilize CSS classes to add styling and improve visual appeal.
WordPress offers plugins for advanced menu customization. Consider plugins like Max Mega Menu, Hero Menu, or UberMenu for more control and functionality.
Poor navigational features can hurt the usability and accessibility of an otherwise beautifully-designed website. It is extremely important that your users are able to access whatever they need on your site, easily and quickly.
Especially if you’ve accumulated many pages and posts, a well-planned navigation bar or menu will make it easy for users to explore everything you have to offer. This simple feature can also help reduce your bounce rates, keeping visitors around for longer
In this article, we’ll walk through how to create a drop-down navigation menu bar in WordPress. Let’s get started!
How to Add a Drop-Down Menu in WordPress: A Step-by-Step Guide
There are several types of navigational menus, as you might have seen while visiting different websites. Let’s look at some of the most popular options.
Arguably the most common type is the header menu:

However, sidebar menus are also very prominent:
You’ll also see plenty of hamburger menus on mobile sites, which is a responsive drop and expands when the hamburger icon is clicked on:

One final example – which is also what we’ll be creating later in this post – is the drop-down navigation menu or navbar. Like the hamburger menu, this style economizes screen real estate, because most of the content is hidden away until it is needed:

Keep in mind that certain themes don’t support drop-down menus. So the first thing you’ll want to do is confirm that your theme offers this option. You can usually find this out by checking the theme’s documentation. Although, it is possible to create a custom drop-down navigation menu html or css code if your default theme is limited.
In the following walkthrough, we’ll show you how to use native WordPress features to build your menu. An advantage of this method is you’ll retain any menu item you create even if you change themes or add new plugins to your site in the future.
Step 1: Create Menu Items
To get started, navigate to Appearance > Menus in your WordPress dashboard. The options available there will be partly determined by your current theme.
Click over to the Edit Menus tab, where you can choose to create a new menu:

Enter a name in the input field under the Menu structure section, and then click on Create Menu:

Once you’ve created at least one menu, you should see a new tab titled Manage Locations, right beside Edit Menus.
Now you can begin adding items to your menu. You can include pages, posts, and custom URLs. To add a page, for example, check the boxes next to the content you want to add under the Pages section on the right, and then select Add to Menu:

The same process applies to posts. If you want to add a link to your menu, expand the Custom Links section and enter a URL as well as some custom text:

You can take similar steps to add categories to your main menu, by expanding the Categories section. Any menu item created this way will open a page containing all the content contained under a particular category.
Step 2: Set Your Menu Structure
At this stage, your menu is not yet organized. Everything will simply show up in the order in which it was added. There’s also no drop-down functionality just yet. So the next step is to resolve those two problems.
To do that, you can simply drag-and-drop your menu items wherever you’d like them to go. You can even create submenu items this way. For example, we’ve listed three specific blog posts so that they’ll appear under the broader Blog menu item:

Once you’re done customizing your menu’s structure and adding each dropdown item, make sure to save your changes. Also note that depending on your theme, you may need to assign your new menu to a location. The relevant options can be found under the Menu Settings section:

Then you can check out your site on the front end to see the menu in action. Any sub-items will show up as a drop-down menu:

Remember that navigation menus should make it easier to browse your website. Therefore, you’ll want to limit the number of items you add to your menus, so they don’t become confusing or cluttered.
Step 3: Add CSS to Your Menu
You can also add custom styling to your drop-down menu by using CSS classes. To do this, start by clicking on Screen Options at the top of your dashboard:

Select the check-box labeled CSS Classes:

This will enable you to create a custom CSS dropdown menu. It will also restrict any custom styling to the items your specific classes are applied to.
Step 4: Preview Your Menu
At this point, your menu is just about ready to go. Before finalizing it, however, you might want to check it out in the WordPress Customizer. You can toggle the opacity, hover, font size and more, while seeing their effects in real-time.
Click on Manage with Live Preview to enter the live editor:

You can make further changes here as needed, such as adding, removing, or reordering menu items:
You won’t need a new tab to preview your changes, since the Customizer shows you a live preview of your website.
Step 5: Publish Your Menu
When you’re ready, you can make your new drop down menu live with a single click. Simply select the Publish button:
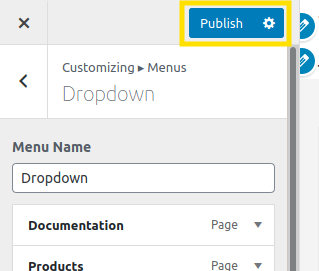
This will make the menu live on your site, and enable visitors to start using it.
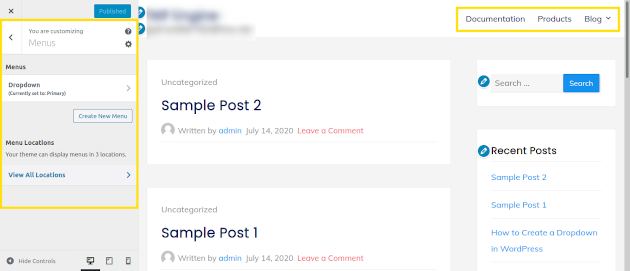
It’s also worth noting that if you’ve created multiple menus and want to place them in various locations, you can use the Customizer for that as well:
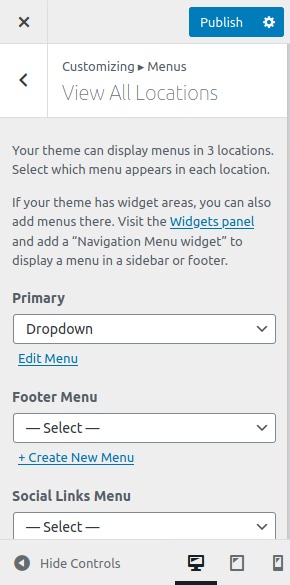
With the Customizer, you can assign menus to all the different locations supported by your theme.
WordPress Drop-Down Menu Plugins
Of course, if you’d rather use plugins to create your drop-down menus, there are several options available. Here are some of the best menu plugins for WordPress, both free and premium:
- Max Mega Menu: A free plugin that adds on plenty of options to the existing menu editor.
- Hero Menu: A highly-customizable tool with a focus on responsiveness.
- UberMenu: A solution that gives you maximum control over your menus’ style and functionality.
Any of these tools can get the job done. So which one you choose will come down to personal preference and the specific features you’re looking for.
Optimize Your WordPress Site with an Efficient Drop Down Menu
It’s important to build visually-appealing and accessible websites. One simple technique that helps in both of these areas is to create drop-down navigation menus. This menu option is attractive and easy to use, and also saves you some screen real estate.
To maintain a user-friendly website, you’ll also need access to the right resources, and you’ll require dependable hosting for your WordPress site. Our plans can help!