Get Started


Key Takeaways
Adobe Analytics provides comprehensive website data. It offers insights on visitor behavior, traffic sources, and predictive analytics for future trends.
Integrating Adobe Analytics with WordPress is essential for data-driven decisions. Manual setup and plugin options like Komito Analytics enhance tracking capabilities.
Use analytics to optimize digital experiences and refine strategies. Combine Adobe Analytics data with WP Engine’s Page Performance for actionable insights.
Consider implementing Adobe Analytics for robust data-driven decision-making. Evaluate the benefits of predictive analytics and enhanced tracking features for website optimization.

One of the hardest aspects of running a website is figuring out if you’re doing things right. For example, if you don’t know how much traffic you’re getting or which keywords are leading visitors to you, it can be hard to know if you need to refine your strategy.
The solution to this problem is to use an analytics tool. With analytics, you get access to actionable data you can use to determine what decisions to take for your website. As far as these tools go, one of the best and most useful is Adobe Analytics.
In this guide, we’re going to talk about what Adobe Analytics is and how it works. Then we’ll teach you how to use Adobe Analytics alongside WordPress, both with and without plugins. Let’s get started!
What Is Adobe Analytics?
Adobe Analytics is a premium service that provides you with data about your website’s numbers. By that, we mean how many people are visiting your site, what they do there, how they find their way to your content, and more. That collection of insights is what we call web analytics.
However, Adobe Analytics goes one step further than many similar tools do. The platform also enables you to connect data from third-party services. This way, you can combine data from your website and your email marketing platform, just to give you one example.
In addition, Adobe Analytics also includes a unique feature called “predictive analytics.” What this does is provide you with insights into future user behavior, based on the data you’ve collected in the past. Naturally, this feature isn’t perfect, but it still provides useful predictions that can help you make decisions.
How to Implement Adobe Analytics with WordPress
Now, let’s look at how to integrate Adobe Analytics with WordPress. The first thing you’ll need to do is sign up for an Adobe Analytics account.
Once you’ve done that, you can integrate it with your WordPress site manually. Then you can use a plugin to get even more options. Below, we’ll look at both of those methods.
How to Manually Implement Adobe Analytics on a WordPress Website
In the next few sections, we’ll walk you through the process of integrating Adobe Analytics with WordPress manually. Let’s get to it!
Step 1: Create a Web Property
First, you’ll need to add a web property to your Adobe account. This means proving to Adobe that you own a specific domain, so the platform can generate a dynamic code unique to your site.
To do this, log in to your Adobe Cloud Experience dashboard and click on the Add Property option. You’ll need to choose a descriptive name for your property, and indicate its domain:
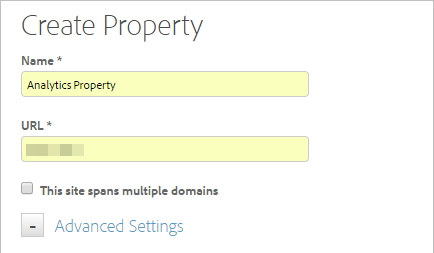
There are some other settings you can play with here, but leaving the default values in place is recommended for most users. Once you’ve filled everything out, click on Create Property and move on to the next step.
Step 2: Set Up an Adobe Analytics Tool
Now that your property is ready, you can go ahead and add the Adobe Analytics tool to it. To do that, open up your property in the dashboard, and then navigate to Overview > Add a Tool > Adobe Analytics.
On the next page, select Adobe Analytics under Tool Type, indicate a name for your tool, and set the Configuration method to Automatic:
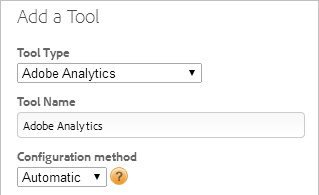
Depending on which type of account you have, you may also need to enter some additional credentials unique to your Adobe account here.
Then click on the Create Tool button at the bottom of the screen, and you’re good to go. All that’s left is to integrate your new tool with WordPress.
Step 3: Add the Analytics Tool to Your Property
To connect Adobe Analytics to WordPress, you’ll need to take some snippets of code the platform provides you with and add them to your website.
You can generate the required code by going into the Reports & Analytics > Admin Tools tab for your property, and clicking on the Code Manager option.
Next, select JavaScript (new), which will download the code to your computer. After that, you can copy the corresponding code to your WordPress header and footer sections. Just keep in mind that you’ll need to add the code to all the individual pages you want to track.
Adobe Analytics Plugins
As far as Adobe Analytics plugins go, there’s only one tool we recommend using. It’s called Komito Analytics:

This plugin works by adding enhancements to your existing WordPress integration. With Komito Analytics, you’ll be able to track advanced elements, such as Calls To Action (CTAs), social interactions, page views with ad blockers, and more. In short, you can think of this plugin as a way to further enhance your Adobe Analytics experience.
Sadly, there aren’t a lot of other reputable options when it comes to Adobe Analytics plugins. One that often pops up in searches, Adobe Analytics for WordPress by RepEquity, does let you configure custom analytics metrics from within WordPress. The problem is that it hasn’t been updated for a long time, which is why we can’t recommend using it.
Using Analytics to Improve the Digital Experience for Your Customers
Using a platform such as Adobe Analytics provides you with the data you’ll need to take your website in the right direction. For example, you can see if you’re hitting the mark with the keywords you’re targeting. If your traffic is decreasing, on the other hand, you can quickly figure out why.
Combine these analytics with WP Engine’s Page Performance data, and you’ll have a treasure trove of information to act on. Our Page Performance tool is available on all our WordPress hosting plans, so feel free to check them out!