How to Use cPanel for WordPress (+ the Best Alternative)
If you’re using a shared hosting provider for your WordPress site, you’re probably familiar with something called cPanel. (Yep, even if you don’t realize it!) This tool is one of the most common methods for managing websites because it allows you to control your site without working on a command line.
Nice, right?
What few people know, however, is that there are actually cPanel alternatives that can offer better, easier solutions for managing WordPress sites.
Want to find out more? Here’s what we’ll cover in this article:
Let’s dive in!
What is cPanel?
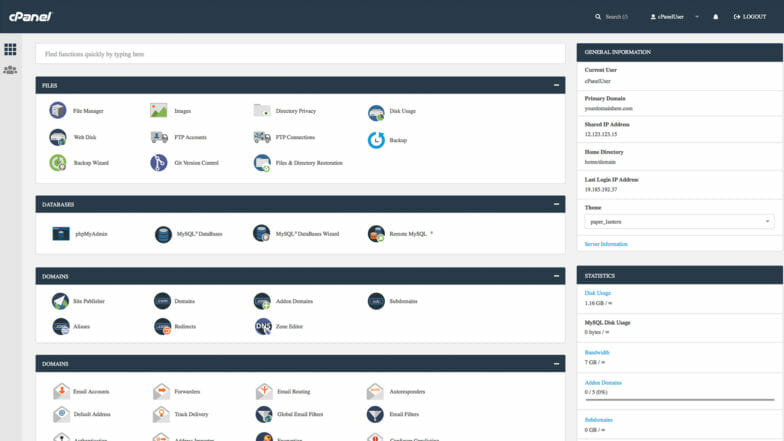
cPanel is a hosting control panel that helps you manage hosted (or live) websites. It features a web-based, graphical interface that allows you to perform a variety of actions to your site/server without needing to work on a command line. cPanel is commonly offered by shared hosting providers as the default solution for maintaining websites, but there are a variety of alternatives including free web panels or WordPress-specific solutions.

cPanel gives you the ability to perform complex site management actions right from your browser. Popular features include:
- SSL certificate configuration
- IP address denials
- Redirects
- File backups
- Log access
- Database administration
- Access to phpMyAdmin
- FTP settings
- File management
Note: While cPanel works with WordPress sites, it’s not WordPress-specific. It’s common to see options that may not be applicable to your site configuration.
cPanel Hosting Alternatives
If your host doesn’t use cPanel by default, there’s a strong chance they’ve created a custom web panel that provides many of these same features (if not more)! That’s the approach we’ve taken for WP Engine’s User Portal. Here’s what it looks like—you’ll notice an immediate difference:
While it doesn’t look the same, custom web panels like this often make site management a lot quicker and easier than cPanel. For the rest of the article, I’ll explain how to perform various site functions on both cPanel and WP Engine’s fully managed platform, so you can compare what works best for you.
How to Use Web Panels to Manage WordPress Sites
Now that you’ve seen a few examples of cPanel and a custom web panel, let’s talk about how to use these tools to manage your WordPress site.
We’re going to focus on the primary web panel actions you might need for your WordPress site, including:
- How to install WordPress cPanel
- How to take backups of your WordPress site
- How to set up DNS
- How to add an SSL certificate
- How to access your site via SFTP
How to Install WordPress With cPanel
If you’re creating a brand new WordPress site, depending on your hosting provider, you might have to install WordPress first. This is often the case with shared hosts, and you’ll find the option within your cPanel dashboard. Follow the directions, and you should be able to get WordPress set up in about five minutes.
Some specialized managed hosting providers, on the other hand, only host WordPress sites. Because of this, they will often handle the installation process for you. As soon as you spin up a site with your chosen host, you’ll be working with WordPress!
How to Take Backups of Your WordPress Site
Taking backups of your site at a regular cadence can be a time-saver if something goes wrong in the future. In fact, WP Engine automatically takes a backup of our customers’ sites every single night (and then give them an easy one-click restore option), because we believe this is so important for each and every site owner.
To take a backup of your WordPress site with cPanel, you’ll need to click the “Backup” icon (it’s probably in the “Files” section). From there, you’ll see a variety of options for manually downloading and restoring backups.
Note: When using cPanel to download and restore WordPress backups, you may need to manually adjust files to make sure you’re only working with the ones that impact your WordPress site. Sometimes the download processes include additional files, which can break your site in the restoration process.
To take a backup of your WordPress site with a managed host, you’ll follow a similar process by navigating to the “Backups” or “Backup Points” tab of the dashboard.
The big difference, however, is that we automatically take backups for you every night, so you don’t have to do it manually. Plus, restoring is a super simple process and only includes the files your WordPress site needs!
How to set up DNS
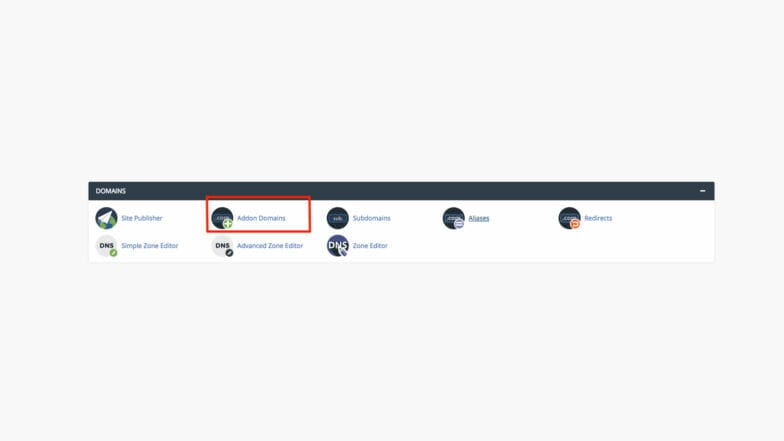
Setting up your domain name is pretty quick in both cPanel and a custom dashboard. With cPanel, you should see a section dedicated to “Domains.” This should have everything you need, whether you’re pointing DNS for the first time, adding a subdomain, or making changes.

*Note: While cPanel allows you to make DNS changes, these changes will only work if your domain is pointed to your host’s nameservers where you’re making changes within the cPanel. If you’re using your domain provider’s default nameservers, then you’ll need to make your DNS changes in your domain provider’s dashboard.
Using WP Engine’s User Portal, you can easily find your domain information under the Domains tab, where can easily set up DNS for the first time or make changes.
Additionally, WP Engine has a bunch of helpful resources to help you go live with a variety of domain registrars! It’s a super simple, streamlined process.
How to add an SSL certificate
Adding an SSL certificate to your WordPress site is a must these days. Not only is it important for site security and performance, but it can also impact your website’s search results and level of trust from visitors.
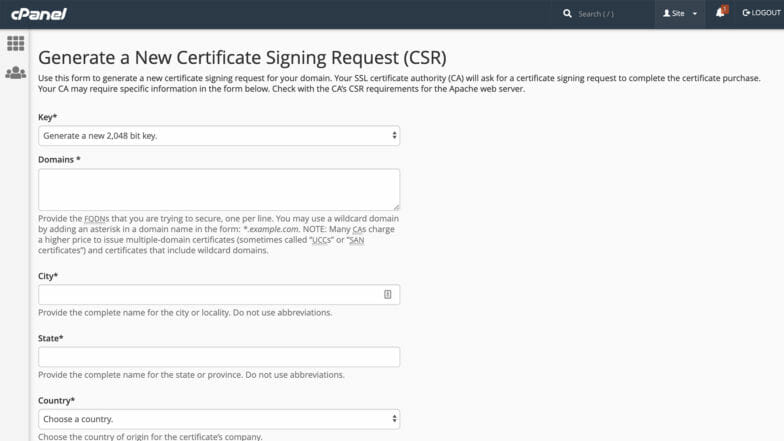
To add an SSL certificate with cPanel, look for the SSL/TLS icon. (Probably in the “Security” section) From there, you’ll need to go through the Certificate Signing Requests (CSR) steps, which involves a back-and-forth process between your hosting provider and SSL certificate provider.

There’s not really a way to speed this up with cPanel, but if you’re using a managed host optimized for WordPress, you’ll have a much better experience. Every site hosted on WP Engine gets a free SSL certificate, and there’s no back-and-forth to set it up—just a few quick clicks.
How to Access Your Site via SFTP
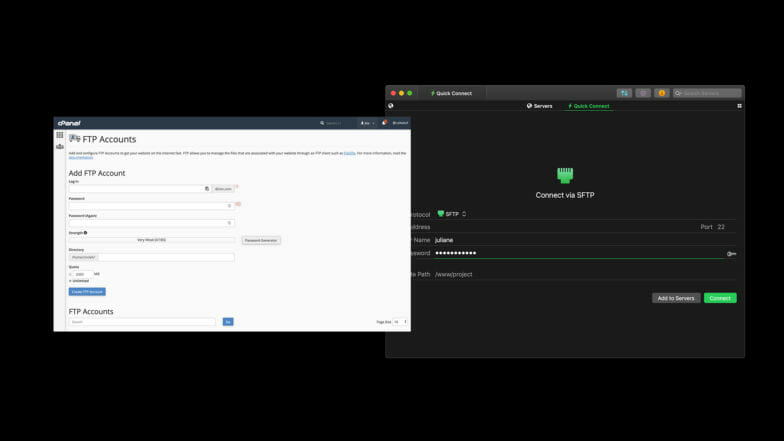
In order to access your site’s files via FTP with cPanel, you’ll need to create specific user credentials for each site you own. To do that, look for the “FTP Accounts” icon in the “Files” section. This will give you all the options you need to create, manage, and remove users and their access to your site via FTP.

Using WP Engine’s platform, it’s easy to manage multiple sites with multiple people. Your account credentials are also your SFTP credentials, so there’s no need to create more usernames and passwords.
This is especially nice if you manage multiple WordPress sites (you’ll see all the sites you have access to in your WP Engine user portal).
Note: This article is a good overview of the primary functions you need for your WordPress site, but you should reach out to your site’s specific host with any questions. If your site is hosted on WP Engine, you can contact our award-winning support team 24/7/365 right here.
Conclusion
cPanel is a good tool for managing your website on a shared hosting provider. What many people don’t realize is that there are advanced alternatives, like managed hosting providers built for WordPress, that make managing your WordPress site easier than ever before!
