How to Create Custom Taxonomies in WordPress
Content in WordPress can usually be gathered into distinct groups. Most of your posts and pages will be assigned to a type of ‘taxonomy’ – i.e. a category or tag – that already exists. However, you might also need to create a custom WordPress taxonomy.
Fortunately, the process for doing this is straightforward. Knowing how to create and update taxonomies will enable you to better organize your site, and help visitors find what they’re looking for more quickly.
In this article, we’ll look at how to create a custom WordPress taxonomy. However, before that, let’s discuss what a taxonomy is in more detail!
What is a WordPress taxonomy?
A WordPress taxonomy is a way to organize posts and other content. The two most common types are categories and tags. Categories are designed for grouping similar posts together, while tags (much like hashtags) describe what a specific post contains.
Most WordPress websites use these built-in taxonomies for organizing content. This is useful to both you and your visitors, since it helps everyone find what they want more efficiently. What’s more, grouping your content this way can even benefit your site’s Search Engine Optimization (SEO).
How to create a custom taxonomy with a plugin
Categories and tags are great, but what if you want other ways to organize your content? As is standard for WordPress, there are both user-friendly and developer-friendly ways to create a custom taxonomy.
We’re going to cover the plugin approach first. The first step is to choose your desired tool. We’ll use the free Advanced Custom Fields (ACF) plugin, based on its flexibility and ease of use. ACF is a complete content modeling solution, allowing you to create not just custom taxonomies, but custom post types and over 30 different custom field types to customize your site.
Step 1: Add a new blank taxonomy and populate the fields
To get started, you’ll want to download the latest version of ACF, and then install and activate the plugin. Once you’ve done that, head to the ACF Taxonomies screen within your WordPress dashboard:
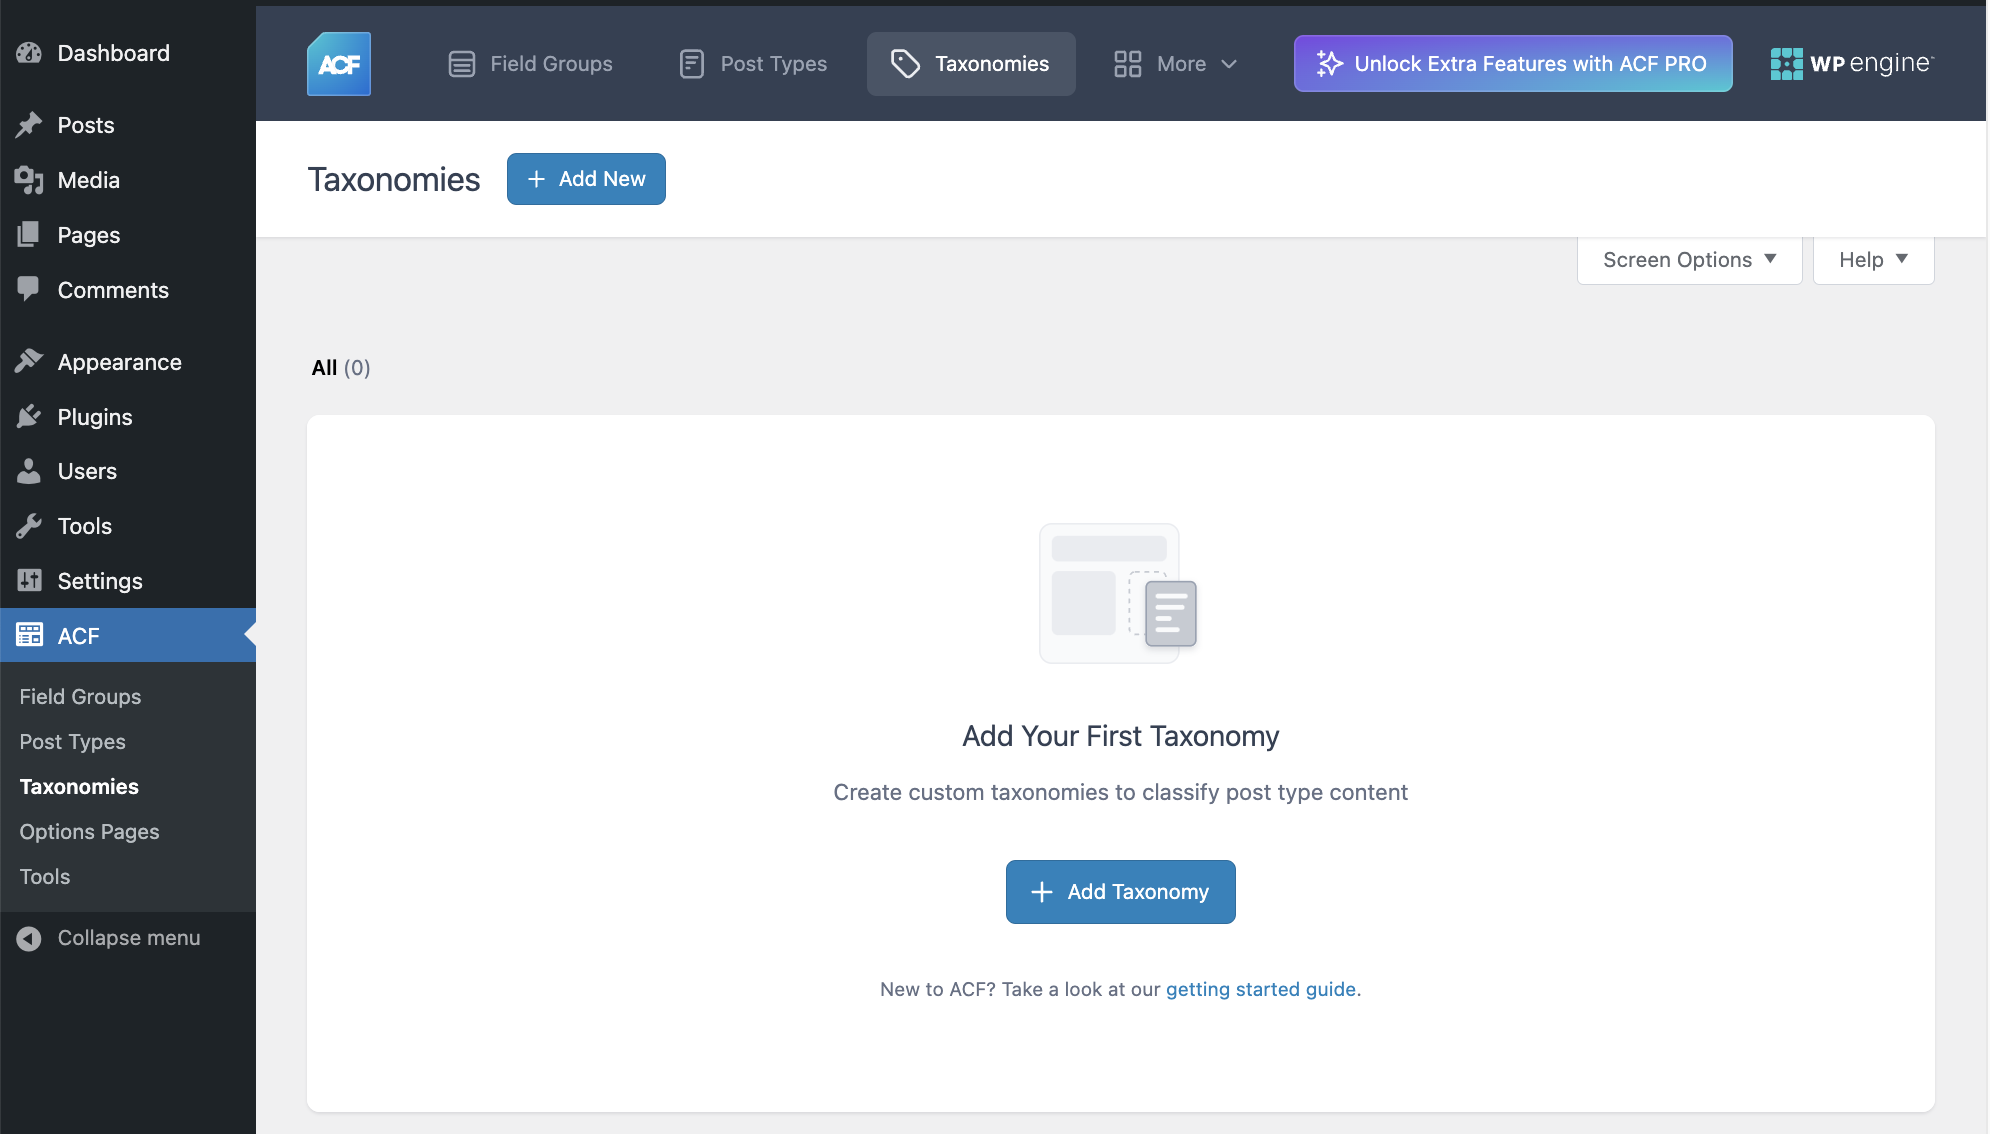
Next, click Add Taxonomy or Add New.
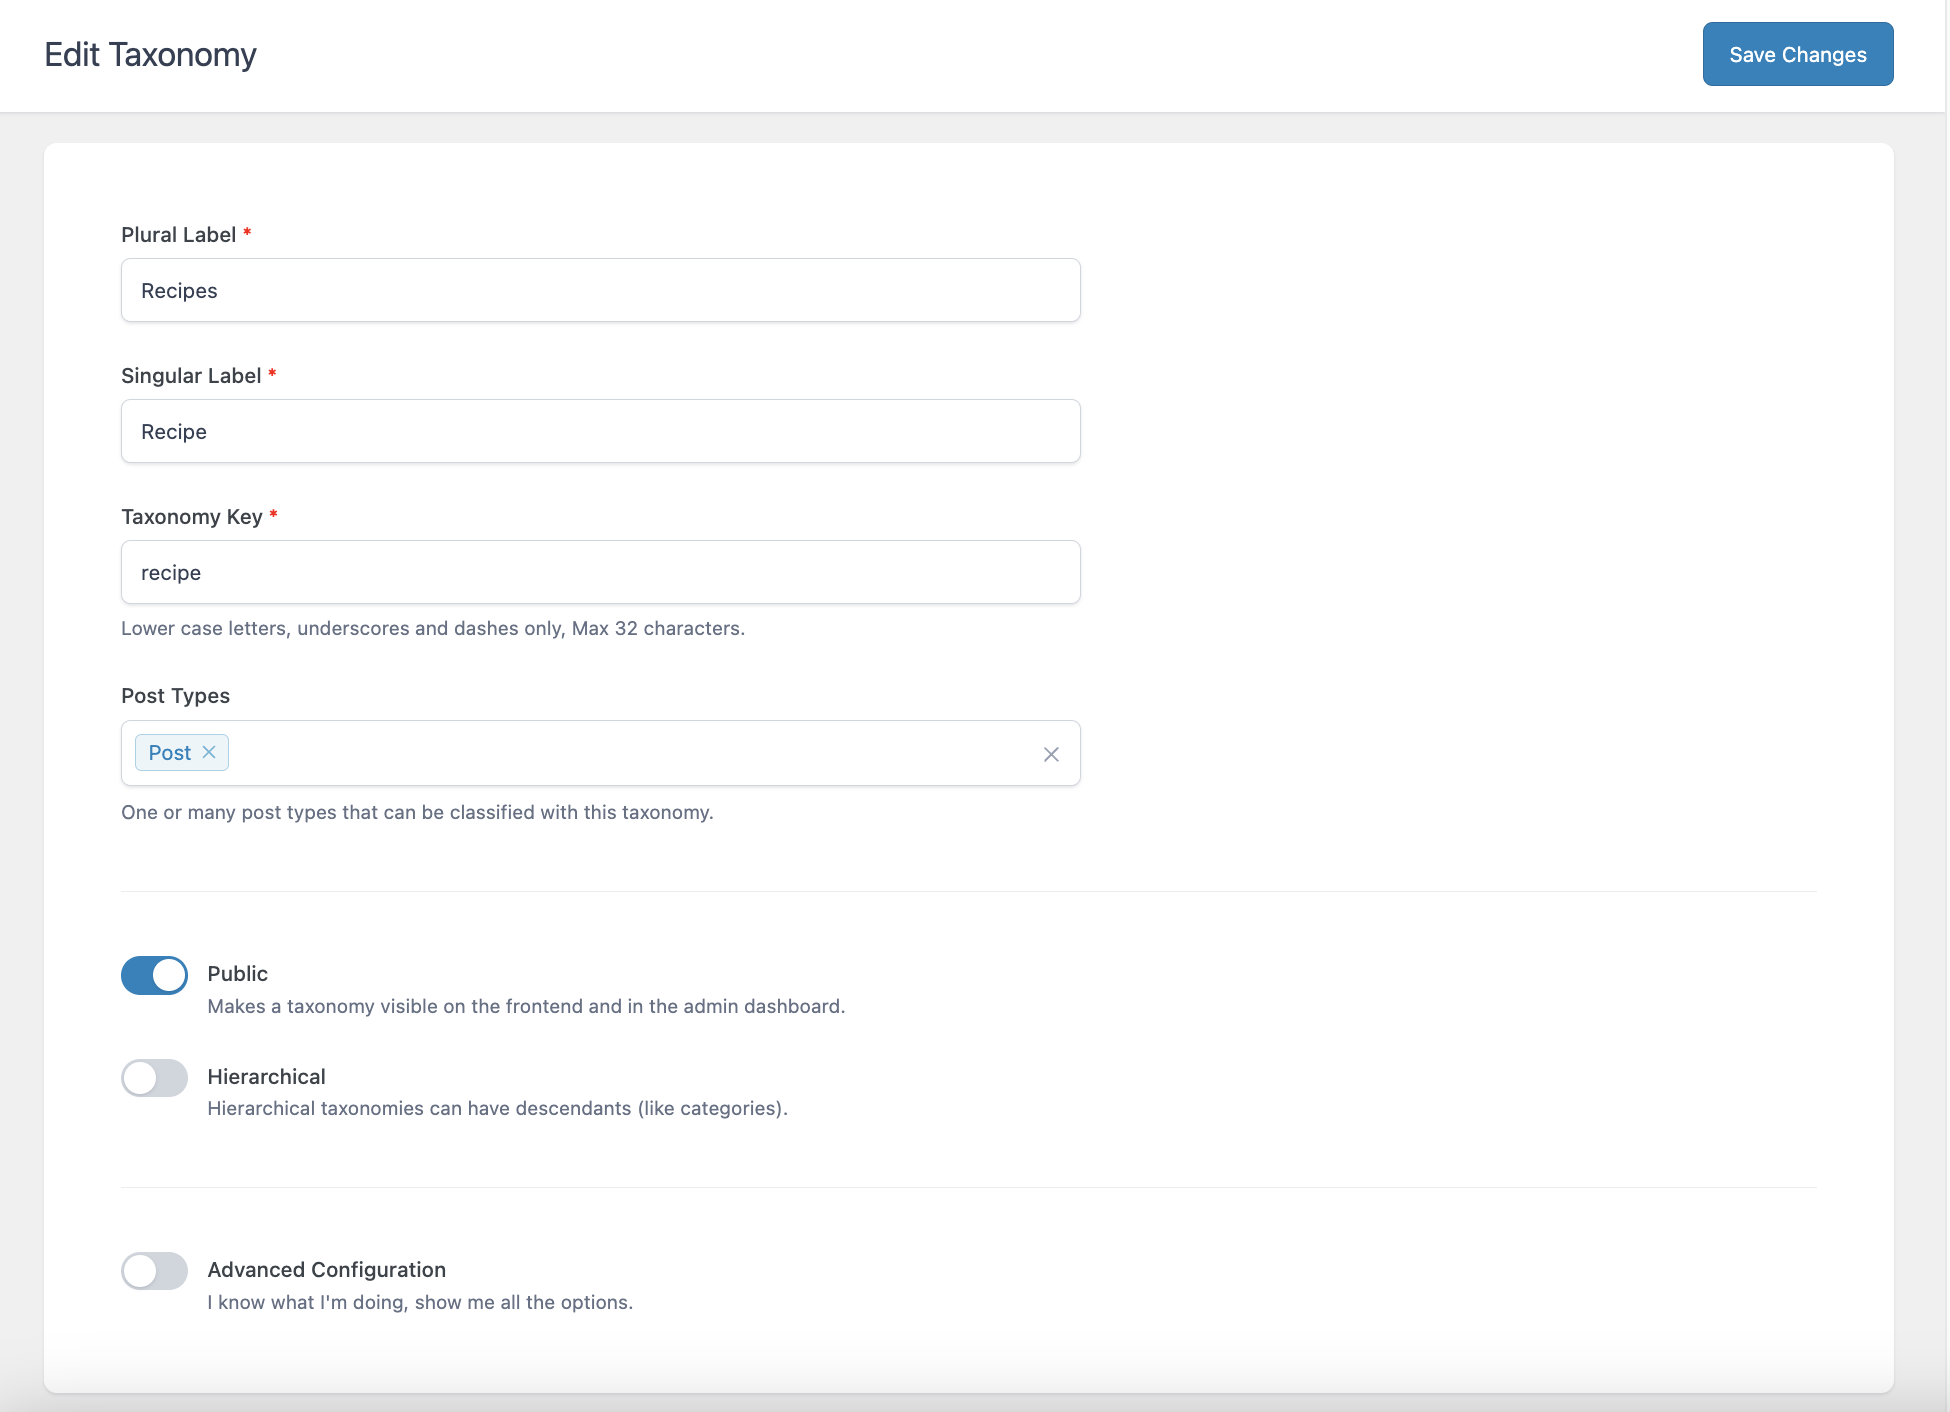
Fill in the required fields for Plural Label, Singular Label, and Taxonomy Key (for example, “Recipes,” and “Recipe,” and “recipe” respectively).
Clicking the Post Types field will open a dropdown that allows you to select one or more of the existing post types on your site. The plugin will not force you to select a post type, but the taxonomy will not be available if you don’t. For now, we’ll just select Posts.
There are also three toggle switches: Public, Hierarchical, and Advanced Configuration. “Public” is toggled on by default. Switch on “Hierarchical” if you want to create further custom taxonomies that have parent-child relationships. For example, you could create a custom taxonomy for “Recipes,” and then a child custom taxonomy within that called “Vegetarian Recipes.”
The third toggle switch, Advanced Configuration, gives you even greater control of how your custom taxonomy works. Please see the ACF documentation for more information on advanced configuration for custom taxonomies.
Once you’ve filled in the necessary fields, click Save Changes.
Step 2: Extend your custom taxonomy
Your new taxonomy is now ready for use. ACF gives you a notification, as well as some handy links to add custom fields, link existing field groups, create or duplicate taxonomies, and create a custom post type.
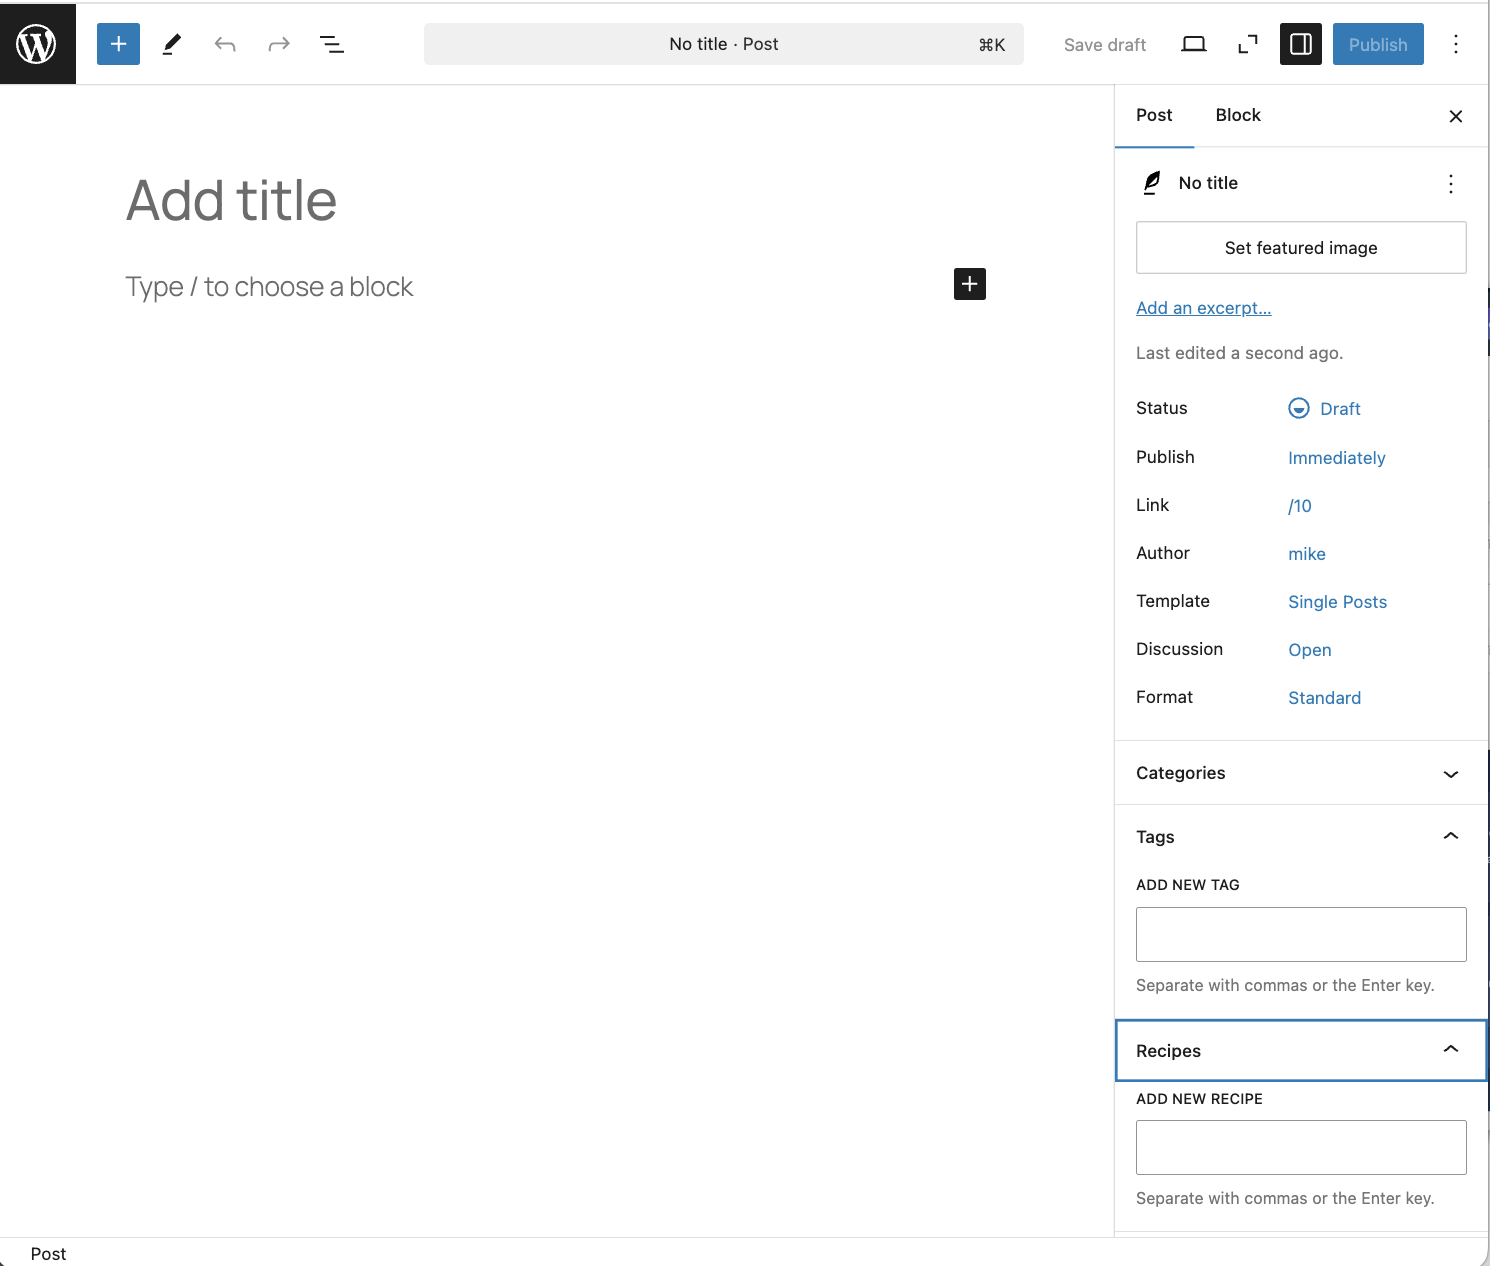
The new taxonomy will be visible when editing any of the associated post types. Since we added it to “Posts,” we can see it when we create a new post:
You can see all your custom taxonomies by clicking ACF > Taxonomies. You can also make edits to your existing taxonomies by clicking on them in this screen.
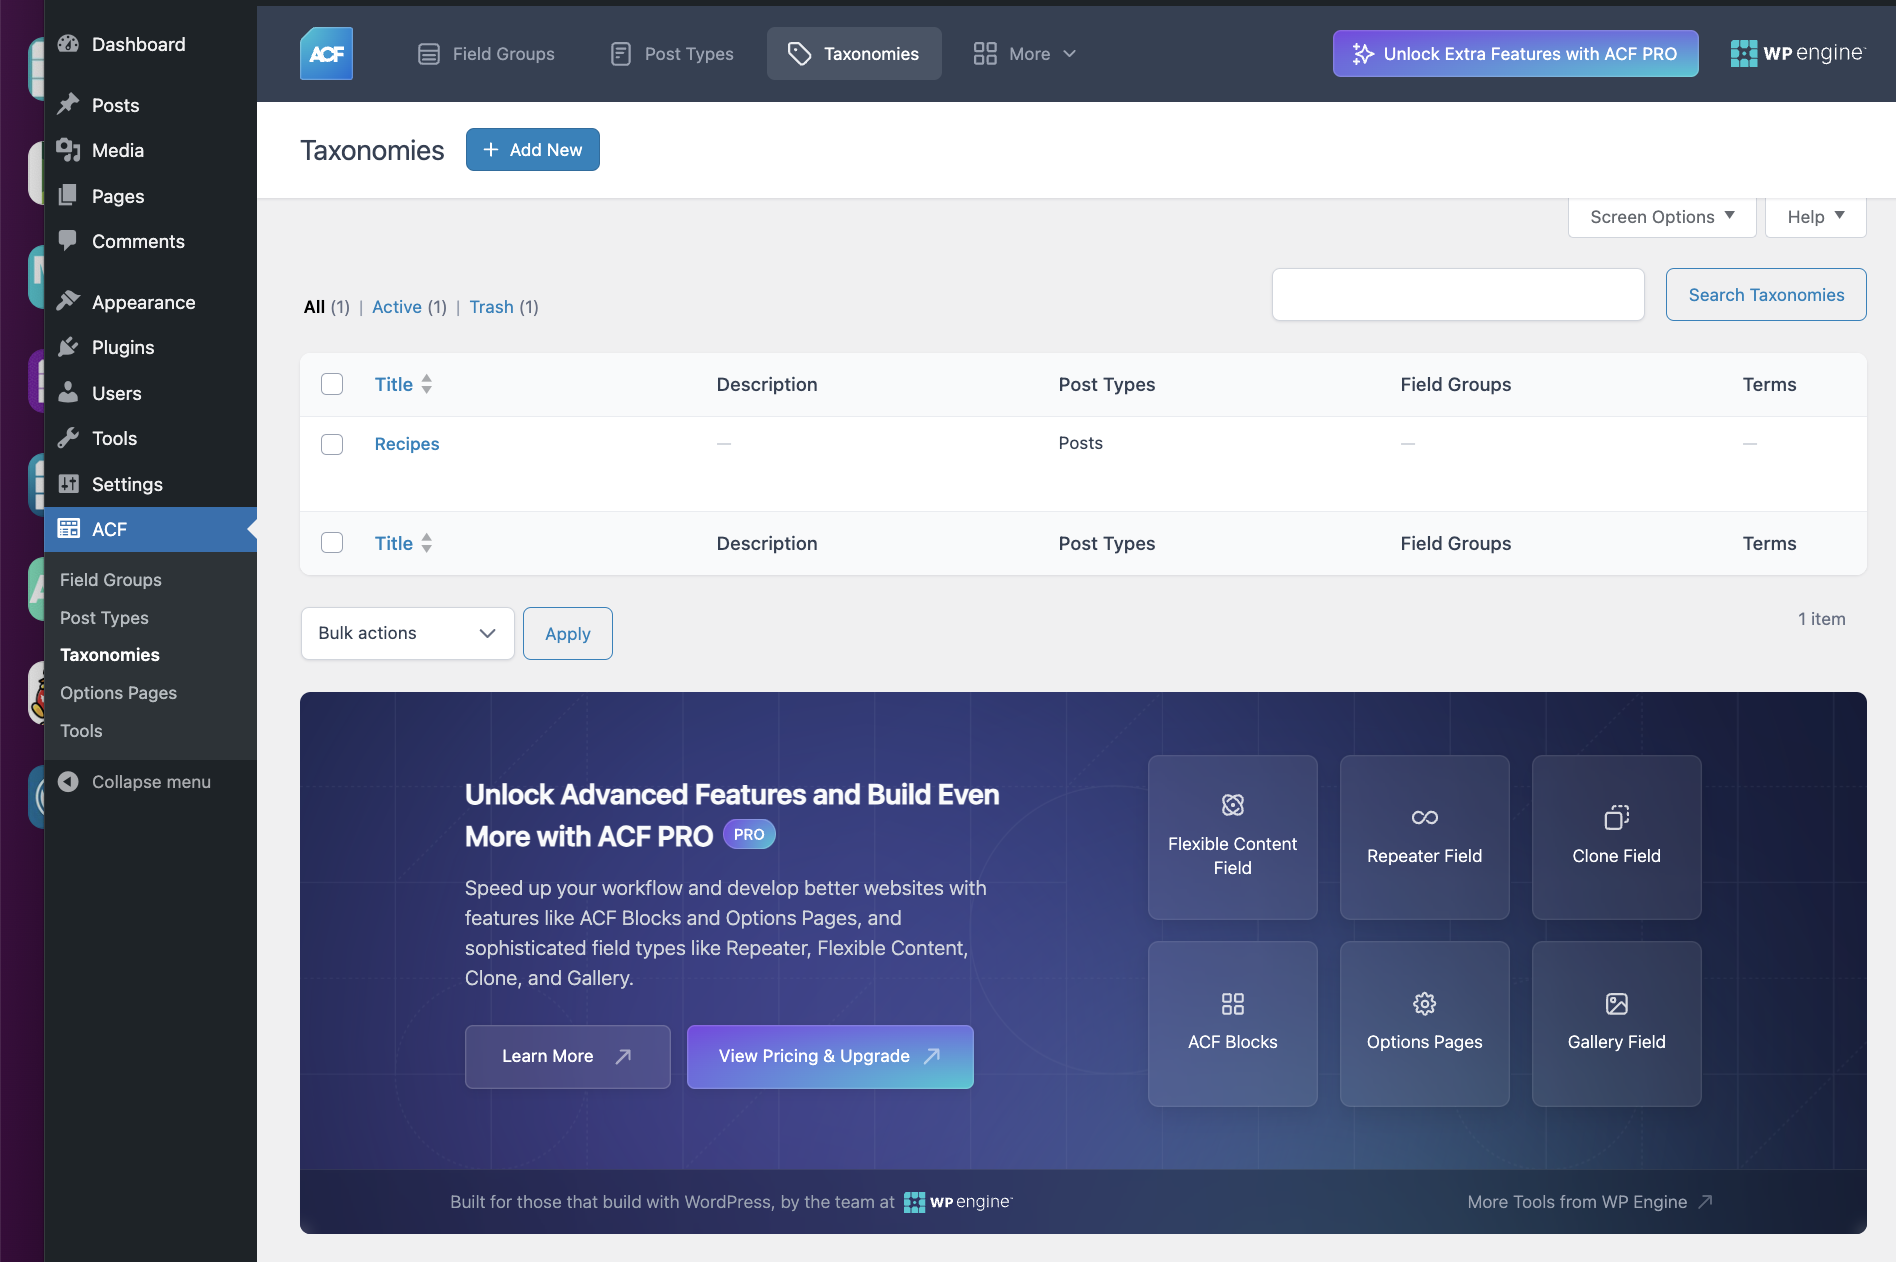
With that, your new taxonomy is set up and ready to go.
How to create a custom taxonomy with code
If you’d rather not use a plugin, or if you’re a developer who finds the manual approach easier, you can create your custom taxonomies with code. The steps below are simple to implement, especially if you have previous experience navigating WordPress’ core files.
Step 1: Determine if you want a hierarchical or non-hierarchical taxonomy
First, you’ll want to decide whether your taxonomy will be hierarchical or not. Here’s a quick summary of the differences:
- Hierarchical. This lets you have parent and child terms, just as with categories. For example, you could have a parent term called Beginners, and child terms such as Plugins, Themes, and Marketing.
- Non-Hierarchical. Like tags, this only lets you define one term to assign to content, without letting you create child terms.
This decision matters, since the code you’ll need is slightly different depending on your preference.
Step 2: Edit your functions.php file
Regardless of your taxonomies’ nature, you’ll need access to your functions.php file. Before you begin:
- Make sure you back up your website before carrying out any work on core files.
- Use a child theme to preserve your changes when updating themes and WordPress itself.
- Brush up on your Secure File Transfer Protocol (SFTP) knowledge if needed, and have a dedicated SFTP client to hand (such as FileZilla or Cyberduck).
Then you can log in to your WordPress website through SFTP, and look for your functions.php file. It should be within your primary theme’s folder. Open the file once you’ve found it, and add one of the following code snippets to the bottom, depending on whether you chose a hierarchical taxonomy or not.
Hierarchical:
// Hook into the init action and call create_book_taxonomies when it firesadd_action( 'init', 'create_subjects_hierarchical_taxonomy', 0 );// Create a custom taxonomy name for your postsfunction create_subjects_hierarchical_taxonomy() {// Add a new taxonomy and make it hierarchical, like Categories// Translate the GUI $labels = array( 'name' => _x( 'Subjects', 'taxonomy general name' ), 'singular_name' => _x( 'Subject', 'taxonomy singular name' ), 'search_items' => __( 'Search Subjects' ), 'all_items' => __( 'All Subjects' ), 'parent_item' => __( 'Parent Subject' ), 'parent_item_colon' => __( 'Parent Subject:' ), 'edit_item' => __( 'Edit Subject' ), 'update_item' => __( 'Update Subject' ), 'add_new_item' => __( 'Add New Subject' ), 'new_item_name' => __( 'New Subject Name' ), 'menu_name' => __( 'Subjects' ), ); // Register the taxonomy register_taxonomy('subjects',array(‘post_type'), array( 'hierarchical' => true, 'labels' => $labels, 'show_ui' => true, 'show_in_rest' => true, 'show_admin_column' => true, 'query_var' => true, 'rewrite' => array( 'slug' => 'subject' ), ));} |
Non-hierarchical:
// Hook into the init action and call create_topics_nonhierarchical_taxonomy when it firesadd_action( 'init', 'create_topics_nonhierarchical_taxonomy', 0 );function create_topics_nonhierarchical_taxonomy() {// Add Labels to the GUI $labels = array( 'name' => _x( 'Topics', 'taxonomy general name' ), 'singular_name' => _x( 'Topic', 'taxonomy singular name' ), 'search_items' => __( 'Search Topics' ), 'popular_items' => __( 'Popular Topics' ), 'all_items' => __( 'All Topics' ), 'parent_item' => null, 'parent_item_colon' => null, 'edit_item' => __( 'Edit Topic' ), 'update_item' => __( 'Update Topic' ), 'add_new_item' => __( 'Add New Topic' ), 'new_item_name' => __( 'New Topic Name' ), 'separate_items_with_commas' => __( 'Separate topics with commas' ), 'add_or_remove_items' => __( 'Add or remove topics' ), 'choose_from_most_used' => __( 'Choose from the most used topics' ), 'menu_name' => __( 'Topics' ), ); // Register the non-hierarchical taxonomy similar to a Tag register_taxonomy('topics','books',array( 'hierarchical' => false, 'labels' => $labels, 'show_ui' => true, 'show_in_rest' => true, 'show_admin_column' => true, 'update_count_callback' => '_update_post_term_count', 'query_var' => true, 'rewrite' => array( 'slug' => 'topic' ), ));} |
You’ll want to change the placeholder names in the above code to whatever you’d like to use for your custom taxonomy. You can also change the post_type within the register_taxonomy function – generally this is going to be Posts, but your needs may vary.
Once you save your changes, you’ll need to do a little more work in order to display your taxonomies. However, before that, let’s discuss how to create custom taxonomies in WooCommerce.
How to create a custom taxonomy in WooCommerce
The good news is that creating a custom taxonomy for WooCommerce products follows almost exactly the same process as the plugin approach outlined above. Of course, you’ll want to ensure that you have WooCommerce installed and products uploaded to your store before carrying those steps out.
The only change required is what happens when you get to the Advanced Options screen. This time, instead of checking Posts (post), you’ll now check Products (product):
Once you save your changes, the taxonomy will be ready to use. Then, the final step is learning how to display the taxonomies you’ve created.
How to display taxonomies
If you’ve come this far, you’ll have all the skills necessary to display your taxonomies. This next set of steps involves adding some code and digging around within WordPress’ templates, so make sure to back up your site if you haven’t already.
Step 1: Decide where the code should be displayed
For this step, you’ll need some knowledge of WordPress’ template hierarchy. This is because you’ll have to add lines of code to every template where you want your custom taxonomies to display.
Quite often, you’ll want to amend single.php, content.php, or another file within your theme’s template-parts folder. However, you could theoretically add your custom taxonomy to any template file.
If you’re struggling to find the template a specific page uses, the Which Template Am I plugin can get the job done by showing you the template path within your browser. Once you’ve made this decision, the final step is to add some code.
Step 2: Add code to where you want your taxonomy displayed
Next, you’ll again want to access your theme’s files via SFTP, and open the template you chose during the first step. From there, you‘ll have to find the spot in your file where the taxonomy should display, and paste in the following:
<?php the_terms( $post->ID, 'topics', 'Topics: ', ', ', ' ' ); ?>
Once you save your changes, you should see the taxonomy displayed on your WordPress website. Of course, you may need to tweak the placement slightly, but the link should still be clickable and the taxonomy registered.
Customize your site with WP Engine
Customizations within WordPress take many forms. In this article we’ve discussed taxonomies, but there are many other features you can add to your site to improve its User Experience (UX).
WP Engine’s flexible assortment of plans gives you the freedom to create and customize your website to your own exacting standards. For more information, check out our website and see for yourself how we can help!
