
What is DNS and How Does it Work?
DNS. Nameservers. MX records. These are just a handful of terms you’ll want to know when working with DNS. Learn how these terms work together with DNS. Learn why (and how!) everyone uses DNS on a daily basis and the inner workings of DNS records! But, I’m getting a little ahead of myself. Let’s start with the basics.
In this article, I’ll be covering:
- What is DNS?
- How does DNS work
- DNS record types
- The difference between DNS and nameservers
- How to check DNS
- How to flush DNS
What is DNS?
DNS, otherwise known as Domain Name System, is an essential piece of navigating the internet. Most people don’t realize they use it every day to do their jobs or check their email! You can think of DNS as a directory that matches names with numbers. In this case, the numbers are IP (Internet Protocol) addresses that help computers communicate and interact with each other and the names are domain names.
DNS is a foundational piece to the internet. Every time you type a domain name into your browser, your computer refers to a DNS server to find the corresponding IP address. Without DNS, you and everyone you know would have to memorize every IP address to connect with the right domain. Yikes! Words (in the form of domain names) are a lot easier to remember than long, confusing number sequences.
Now that you know what DNS is, there are a few other terms that will be helpful to know as you’re pointing domain names and taking your site live.
DNS Registrar
A domain registrar, or DNS registrar, is a business that sells domain names and registers them. Some common examples include:
DNS Propagation
DNS propagation is the time period that occurs when you update the nameservers for a domain. Most experts say this is between 24 and 48 hours, but oftentimes propagation happens in that first 15 minutes. Propagation can load for one person but not another living in another region.
How Does DNS Work?
As you now know, DNS works as a directory that matches domain names to IP addresses. Without DNS, you would only be able to visit a website (or any website) by visiting its IP address directly (talk about a miserable user experience). DNS makes it so we can type in a domain name, rather than memorizing an entire IP address. Let’s look at an example to see how DNS works.
Let’s say you type wpengine.com into the browser bar. Your device will use a DNS server to find the IP address of that website’s server. Once the IP address is known, your device can then contact the website’s server, which will then serve your device the website that you want to access.
Now that you know what DNS is and how it works, it’s time to dig into DNS record types, nameservers, flushing DNS, and so much more.
DNS Record Types
There are several types of DNS records, and each one stands for something different.
The DNS records I’ll talk about in this article include:
[article_callout]
Before we dive in, two important notes. First, if you’re using nameservers other than the default ones provided by your domain provider, you probably won’t have the ability to modify DNS records. Reach out to your host if that’s the case. Second, we used Hover in these screenshots to show how to create DNS records. Depending on your domain registrar, this interface may look different, however the records and what the records require remain the same.
[/article_callout]
A Record
The A record (one of the most common DNS record types) is used to point a hostname at an IP address. This record type can be used to point your domain name at your web host or for creating subdomains which point directly to an IP address.
Depending on your domain registrar, the formatting or layout may be different, however most A records require these three things:
- Host name
- IP address
- TTL
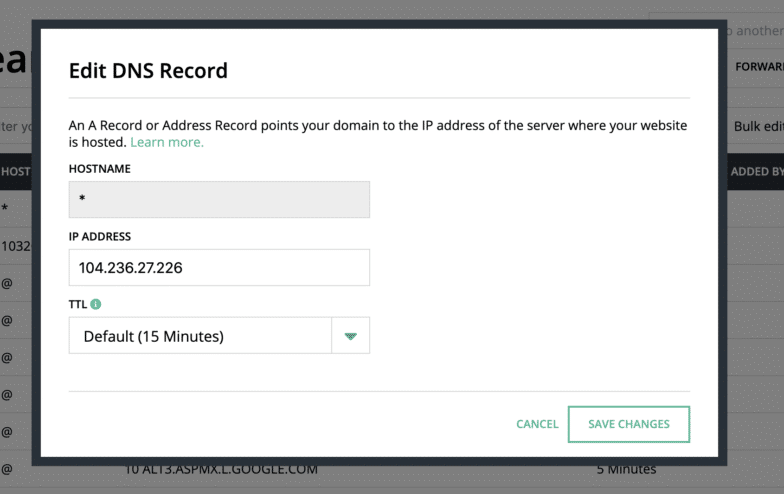
This is an example of creating an A record in Hover. While the format may look different, the essential items you need to add an A record will be the same: host name, IP address, and TTL.
[article_callout]
Note: TTL,or Time to Live, is a value that tells local resolving name servers how long a record should be stored locally before a new copy of the record must be retrieved from DNS.
[/article_callout]
MX Record
The MX record (or Mail Exchange record) is arguably one of the most important because it’s connected to something extremely important to most businesses: email. The MX record specifies how an email should be routed. The MX record points to the servers that should send and receive email for the domain. In other words, the MX record tells the world where your email needs to be delivered.
MX records require these items:
- Host name
- Priority
- Mail Server
- TTL
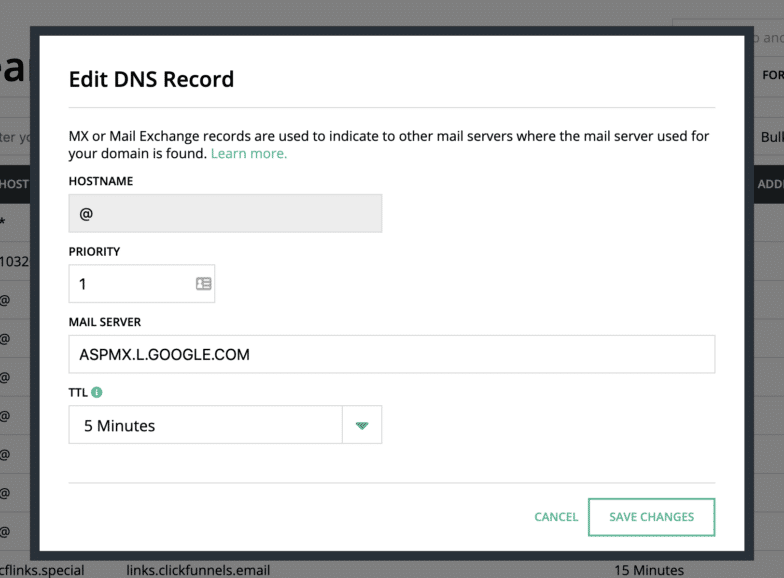
This is an example of creating an MX or Mail Exchange record in Hover. Again, even if you’re using a different domain registrar, the essential items you need to create an MX record will be the same: host name, priority, mail server, and TTL.
We’ve covered host name and TTL in the above section, but let’s dig deeper into what priority and mail server are.
Priority is fairly important when dealing with MX records. When a remote client does an MX lookup for the domain name, it gets a list of servers and their first choice numbers. The MX record with the smallest first choice number has the highest precedence and is the first server to be tried. The remote client will go down the list of servers until it successfully delivers the message or gets permanently rejected due to an inaccessible server or if the mail account does not exist on that server. If there is more than one entry with the same preference number, all of those must be tried before moving on to lower-priority entries.
TXT Record
TXT records allow users to associate text with a hostname. TXT records have many uses. A couple common scenarios where you might add a TXT record would be to define Sender Policy Framework (SPF) information or for Google domain verification. SPF is an email authentication technique which is used to prevent spammers from sending messages on behalf of your domain.
Adding a TXT record requires:
- Host name
- Content
- TTL
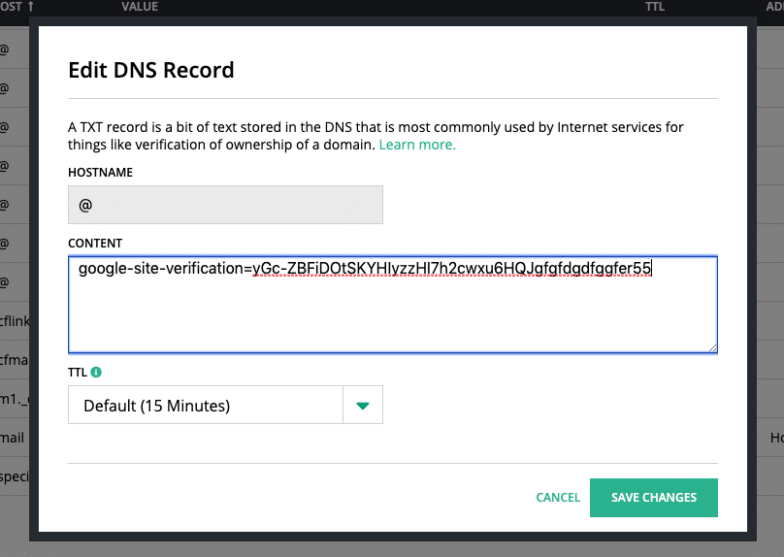
This is an example of creating a TXT record in Hover. Even if you are using a different domain registrar, the essential items will be the same: host name, content, and TTL.
CNAME Record
A CNAME record, otherwise known as Canonical Name record, is a name pointer. A CNAME record points a hostname to another name that is already created for a server or system. CNAME records are useful when running multiple services (such as an FTP and a webserver) from a single IP address. Each service can then have its own entry in DNS (such as blog.mydomain.com or ftp.mydomain.com).
Note: CNAMEs should only be used when you can’t use an A record.
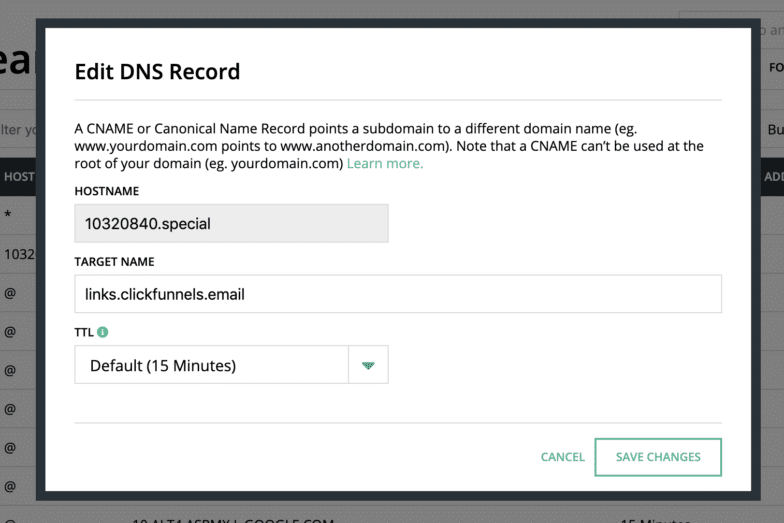
This is an example of creating a CNAME in Hover. Even if you are using a different domain registrar, the essential items will be the same: host name, target name, and TTL.
The Difference Between DNS and Nameservers
People tend to mix up DNS and nameservers, however, the function of these two properties are extremely different.
Nameservers serve as a singular control to be able to point the entire domain to a host. For example, if you want your email, website, and everything else to be hosted by ONE host, nameservers are the better choice. Typically, there are two nameservers: a primary domain and a secondary domain, in case the primary domain is broken.
Note: In some cases, you can control your DNS records within your host’s dashboard if your nameservers are pointed to your host.
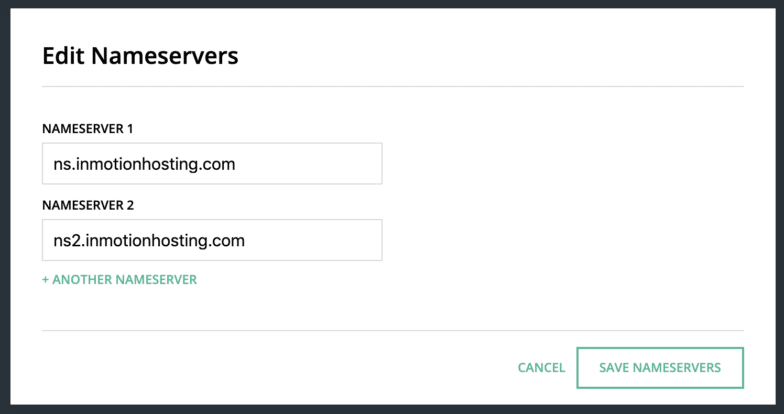
This is an example of creating nameservers in Hover. Typically, you’ll need to fill in both a primary and secondary nameserver.
Think of DNS as a place where you can customize where you want your domains to go. Let’s say you’re a Flywheel customer, so your website is hosted on Flywheel’s managed hosting platform for WordPress. We don’t offer email hosting, so you choose Google as your email host. By using DNS records, you can better customize your domains. We recommend having a separate email and web host, so we typically recommend using DNS records rather than nameservers.
How to Check DNS
Now that you know the in’s and outs of DNS, let’s learn how to check it. I recommend two different ways to see if your DNS is pointed correctly:
- In the WP Engine Dashboard
- DNSchecker.org
In the WP Engine Dashboard
If you’re a WP Engine customer, you don’t even have to leave the dashboard to check your DNS!
- Login to the User Portal
- Select the environment name where the domain is mapped
- Click Domains
- Scroll down and review the message listed next to each domain
If there’s something wrong, submit a ticket and reach out to one of our 24/7 Support Team and they would be happy to help you!
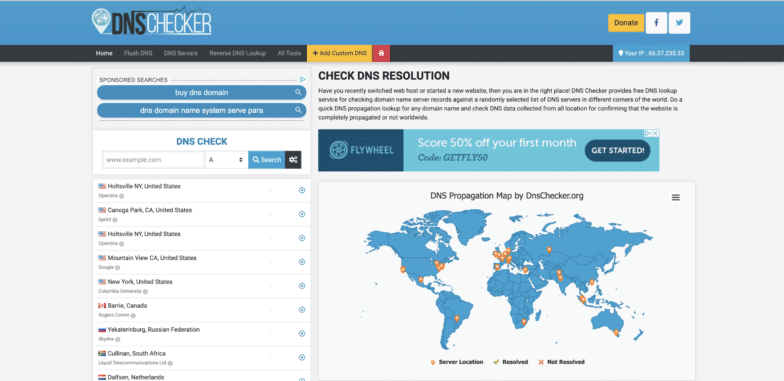
This is a great tool that provides a free DNS lookup service for checking domain name server records against a randomly selected list of DNS servers in different corners of the world. Do a quick DNS propagation lookup for any domain name to confirm that the website is completely propagated (or not) worldwide.
How to Flush DNS Cache
If you’ve just updated your DNS records, it may take some time to fully update, so you may need to flush your DNS cache. The process of flushing DNS cache differs based on your machine and operating system.
How to Flush DNS Cache on Mac
The first step in flushing your DNS cache on Mac is identifying which model you have:
- OS X 12 (Sierra) and later
- OS X 11 (El Capitan) and OS X 12 (Sierra)
- OS X 10.10 (Yosemite)
- OS X 10.9 (Mavericks)
- OS X 10.7 (Lion) and 10.8 (Mountain Lion)
- OS X 10.5 (Leopard) and 10.6 (Snow Leopard)
- OS X 10.4 (Tiger)
Once you know your model, open Terminal and paste the corresponding commands.
OS X 12 (Sierra) and later
macbook$ sudo killall -HUP mDNSResponder;sudo killall mDNSResponderHelper;sudo dscacheutil -flushcacheOS X 11 (El Capitan) and OS X 12 (Sierra)
macbook$ sudo killall -HUP mDNSResponderOS X 10.10 (Yosemite)
Versions 10.10.4+
macbook$ sudo dscacheutil -flushcache;sudo killall -HUP mDNSResponderVersions 10.10.1, 10.10.2, 10.10.3
macbook$ sudo discoveryutil udnsflushcachesOS X 10.9 (Mavericks)
macbook$ dscacheutil -flushcache; sudo killall -HUP mDNSResponderOS X 10.7 (Lion) and 10.8 (Mountain Lion)
macbook$ sudo killall -HUP mDNSResponderOS X 10.5 (Leopard) and 10.6 (Snow Leopard)
macbook$ dscacheutil -flushcacheOS X 10.4 (Tiger)
macbook$ lookupd -flushcacheHow to Flush DNS Cache on Windows
The first step to flushing your DNS is to open your “Windows Command” prompt.
For WinXP:
Click Start.
Click Run.
Type cmd and press Enter.
For Vista, Windows 7 and Windows 8:
Click Start.
Type Command in the start search field.
Then, right-click the command prompt icon and select the option to Run as Administrator.
In the open prompt, type ipconfig /flushdns. You should receive a message of your success as confirmation when the cache is cleared.
Conclusion
DNS and its components can seem difficult, but it doesn’t need to be! Think of DNS as a really intricate machine that needs every screw and bolt to run correctly. As long as you have every piece in the right place, everything will be smooth sailing!
