Get Started


Key Takeaways
Migrating a WordPress site is straightforward. Learning to move a site to a new host can be done in a few hours with clear tutorials, making the process manageable for leaders.
Signs for migrating your site include downtime and slow speed. Recognizing these indicators early can help plan a smoother migration and maintain user satisfaction.
Choosing the right hosting type is crucial. Understanding shared, VPS, dedicated, and managed hosting options is essential for prioritizing security, speed, and support.
Consider manual migration for large websites. While plugins simplify the process, manual migration is recommended for larger sites to avoid errors and ensure a smooth transition.
Ideally, you’ve chosen a hosting provider that’s so good you won’t ever need to move your website.
However, not all hosting providers offer the same level or quality of service. If you choose the wrong one, you may have to move your WordPress site at some point.
Fortunately, migrating your site isn’t as complex as you might imagine. Learning how to move a WordPress site to a new host might take a few hours, but the process is relatively straightforward. Plus, if you choose a web host that offers fast hosting for WordPress and more features, the effort to migrate a WordPress site will be well worth it.
In this article, we’ll teach you the best way to migrate a WordPress website, step by step. Then we’ll introduce you to some WordPress migration tools you can use to simplify the process. Let’s get moving!
Should I Migrate My WordPress Site Manually or Automatically?
Migrating a WordPress website isn’t hard. However, if you want to do so manually, you’ll need to be comfortable using File Transfer Protocol (FTP), accessing databases, and modifying files on your old site’s back end.
Those processes sound complex, but they’re simple enough if you follow a clear tutorial. However, if you’d rather try a simpler approach, you can always use a WordPress migration tool or plugin. There are several options, and we’ll introduce you to some of our top picks later on.
Keep in mind that large websites can be more prone to errors when using migration plugins. In those cases, manual migration is the better approach. If you follow the instructions carefully, you shouldn’t encounter any problems.
Finally, it’s worth noting that some web hosts offer free migration services to new subscribers. You can also hire a third-party service to help you move your site, although that can be a pricey solution (and you’d need to make sure you choose a company with a sterling reputation).
Related Articles:
- Enhance WordPress Performance with Speed Optimization
- Move WordPress Site to a New Domain
- Easily Convert HTML to WordPress Theme
- Using MySQL with WordPress
- Easy Ways to Learn WordPress
When Should You Migrate Your WordPress Site?
Deciding to migrate your WordPress site to a new host is a significant step, often triggered by a variety of technical and business-related factors. Recognizing these signs early can help you plan a smoother WordPress migration and avoid potential headaches. One of the most common reasons is recurring downtime. If your website frequently becomes unavailable, it frustrates users and can negatively impact your search engine rankings. Similarly, slow page speed is a major concern; if your site takes too long to load despite optimization efforts, your hosting provider might be the bottleneck. As your website traffic grows, your current hosting plan might struggle to keep up, signaling that you need a more robust solution. Security incidents, such as malware attacks or data breaches, are critical indicators that your current host’s security measures are insufficient, making a migrate wordpress to new server a priority.
An outdated technical environment, like old versions of PHP or MySQL, can lead to compatibility issues with modern themes and plugins, and pose security risks. Lack of scalability features can also hinder your site’s growth, prompting a move to a host offering more flexible resources. Business-driven scenarios also necessitate a WordPress site transfer. For example, a significant rebranding or domain name change often involves moving the website to align with the new brand identity. Ownership transfers, where a website is sold or acquired, naturally require migrating the site to the new owner’s preferred hosting environment. Understanding these triggers for a WordPress migration will help you determine if it’s time to move WordPress site to new host and ensure your online presence remains strong and reliable.
How to Migrate Your WordPress Site Manually
Even if you’re not afraid to roll up your sleeves and migrate your site by hand, you’ll probably want a little help getting started. Let’s walk through the process, one step at a time.
Step 1: Choose a New WordPress Host
If you’re researching how to migrate your website, there’s likely a reason you’re leaving your current host and exploring a new host. You’ll want to keep any problems you’ve experienced in mind as you shop for a new home for your WordPress website.
For example, if your site suffered a breach, you’ll want to look for a new provider that offers top-notch security features. It’s also important to understand the different kinds of hosting that are available to choose from. These include:
- Shared: This is when one server houses many websites that all share resources, and is typically the most budget-friendly option.
- Virtual Private Server (VPS): A VPS involves virtual partitions within a shared server, so your site has dedicated resources available to it.
- Dedicated: With this type of plan, you get a physical server that houses and supports only your website.
- Managed: Any type of hosting plan can be managed, if the hosting provider is managing technical tasks such as backups and updates for you.
In order to choose the best option for your website, you’ll want to assess what your main priorities are. Key considerations include security, data storage, speed, and customer support. For example, if you have a large eCommerce operation, security may be higher on the list than other items.
Step 2: Back Up Your WordPress Site Files
The first thing you need to do is make a copy of all your website’s files. To do this, you’ll want to use an FTP tool. If you don’t already have one, FileZilla is an excellent (and free) option.
After you connect to your site’s server via FTP, you’ll need to navigate to your WordPress root folder, which contains all the files on your site. It’s usually called either public_html or www, or is named after your site:
Now, right click on your root folder and choose the Download option:
This will download a copy of your entire root directory to your computer. The process can take a while, but when it’s done you’ll be ready to move on.
Step 3: Back Up Your WordPress Database
At this point, you already have a copy of your website’s files. Now you need to back up its database. This is where all the information about your site’s content, users, and lots more is contained.
To do this, you’ll need to access your database. Most web hosts enable you to do this through your control panel. For example, if you’re using cPanel, you’ll find a section called Databases. In that section, you’ll want to click on the phpMyAdmin option:
Step 4: Export Your WordPress Database
Once you’re in, choose your site’s database from the list on the left, and navigate to the Export tab using the top menu. Select the Quick option under Export Method, and hit Go:
This will download a copy of your site’s database in .sql format.
Step 5: Create a New SQL Database and Import the Contents of Your Old One
Next, you must create a new database on the web host you’re moving to. Then you’ll import the file from your old database, which will override the contents of the new one.
If your new WordPress host also uses cPanel, here’s what you’ll need to do:
- Go to the Databases section in cPanel, and choose the MySQL Databases option.
- Create a new database and add a user to it from this same tab (and take note of the names you use for later).
- Access the new database using phpMyAdmin, as you did during the previous step.
- Go to the Import tab within the new database, and upload the .sql file you generated earlier.
That’s it! Now your old database is located on your new web host. However, you still need to re-upload the rest of your old site’s files.
However, if you’ve chosen a host that does not use cPanel, you’ll need to consider a different set of instructions. For example, if you’re migrating to one of our WP Engine hosting plans, you can use our helpful and interactive migration checklist tool:
You’ll find this in your User Portal. It can be used to guide you through a migration to a production environment.
Step 6: Upload Your WordPress Site Files to the New Web Host
For this step, you’ll need to first log into your new server via FTP. Then, navigate to its root folder.
Right-click anywhere within that folder, and select the Upload option. Locate the folder you downloaded during the first step, open it, and select all the files and directories within.
The upload process can take a while, since we’re talking about hundreds of files. If you’re patient, however, you’ll soon find yourself almost at the end of the journey.
Step 7: Edit Your WordPress Site’s wp-config.php File
Once all your files are up on the new server, you’ll need to access your WordPress root folder one more time. If you try to actually visit your website now, it won’t work, because you need to update WordPress’ wp-config.php file so that it points towards your new database.
To do this, locate the wp-config.php file within your new root folder, right-click on it, and select the View/Edit option:
This will open the file using your local text editor, enabling you to make changes. Here are the three lines you’ll need to update:
define('DB_NAME, 'db_name');
define('DB_USER, 'db_user');
define('DB_PASSWORD, 'db_pass');
Currently, all three lines will include values that point towards your old database. Go ahead and replace the lowercase variables with the credentials for your new database, which you created during Step 3.
Then, save the changes to the file and close it. You should now be able to access your WordPress website, which will look just as it did before.
Step 8: Configure and Change Your DNS
Finally, you’ll need to make sure your Domain Name Server (DNS) is pointed toward the correct host. For example, if you migrate to one of our hosting plans, you’ll need to point your DNS to your new WP Engine server.
To do this, you’ll need two things:
- Information from your new host
- Access to the registrar where you purchased your domain name
You can find the details you need by going to your WP Engine User Portal again and clicking on Domains:
Near the bottom of the Domains screen, you’ll find a section called DNS Details. There you’ll find both a CNAME Record and an A NAME for your website:
This is the information you’ll need to enter into your domain name account. Depending on where you purchased the domain, the process for doing so can vary. In order to help you complete the DNS configuration process, we’ve put together a list of the most common registrars, along with detailed instructions for each one.
Pre-Migration Checklist: Steps to Prepare Your Site
- Audit and update: Ensure WordPress core, themes, and plugins are on their latest versions. This minimizes compatibility issues when you migrate wordpress site to new host.
- Clean up: Delete any unused plugins and themes to reduce the size of your migration and potential security vulnerabilities.
- Full off-site backups: Create complete backups of both your website files and the WordPress database. Store these backups in a secure, off-site location. This is crucial for a smooth backup and restore wordpress site to new server.
- Record current settings: Document your current DNS settings and any email configurations associated with your domain. This will be helpful during the post-migration setup.
- Verify host compatibility: Confirm that your new host’s environment (PHP version, MySQL version, etc.) is compatible with your WordPress site. Check PHP memory limits and maximum upload sizes.
- Enable maintenance mode: Just before starting the migration, put your site into maintenance mode to prevent any changes during the process.
- Communicate downtime: Inform your users or stakeholders about any expected downtime during the WordPress migration. This helps manage expectations.
- Disable caching and security plugins: Temporarily deactivate caching, firewall, and redirect plugins on your old site, as they can sometimes interfere with the migration process. Remember to re-enable them on the new host.
How to Migrate Your WordPress Site With a Plugin
When moving a WordPress site, it’s not unusual to have some anxiety about the process. After all, you’ve worked hard to build what you have, and you don’t want to lose any of it along the way. Fortunately, there are several excellent migration plugins available that can help.
Using a WordPress plugin often provides you with an insurance policy. That’s because many of these tools can create complete site backups for you, as well as provide recovery services. Additionally, if you only need to migrate part of your site, some plugins can customize the process to meet your needs.
Tools for Migrating WordPress Sites Easily
Knowing how to migrate a WordPress website manually is useful. As we mentioned earlier, however, there are also some tools you can use to simplify WordPress site migration. Here are some of our favorites!
WP Engine’s Automated WordPress Site Migration
If you’re moving your site to WP Engine, WP Engine Automated Migration can make the entire process a lot simpler. It takes care of everything, from copying your files and database to moving them to the new server. All you have to do is enter some credentials, and the WordPress plugin will take care of the rest.
WP Migrate

WP Migrate Lite exports all the files required to recreate your site in another environment. The intuitive interface allows you to fully configure your export with what you want to include. With just a few clicks, you’ll have a downloadable ZIP file of your complete site, ready to migrate. You can even import the ZIP file to Local and have a complete copy of your site up and running in minutes.
In addition, the plugin can find and replace content anywhere in your WordPress database with full support for serialized data, making it easier to migrate your database without risk of corruption.
WP Migrate Pro offers even more capabilities, with the ability to push and pull files–including media, themes, and plugins–between two installs, multisite support, and integration with WP-CLI.
WPvivid Backup Plugin
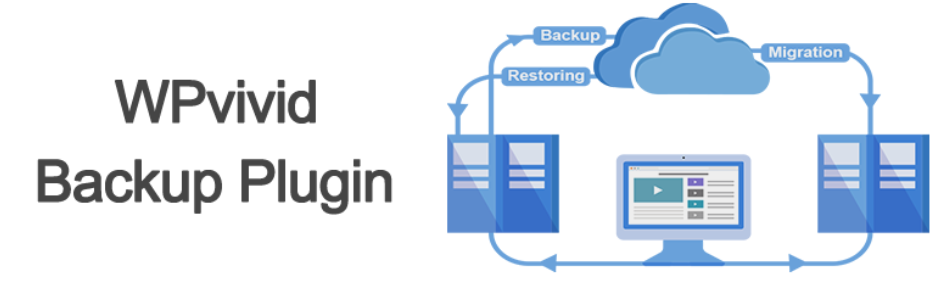
WPvivid Backup plugin is perfect for site migration, as well as for keeping a copy of your WordPress site on hand. It supports both automated migration and manual migration (uploading a backup to a destination site and then restoring it). What’s more, it’s completely free and has no restrictions on the website size you can migrate.
Migrate Your WordPress Site to WP Engine
Our main goal at WP Engine is to make your life easier. That’s why we provide you with a dedicated plugin you can use to take advantage of our industry-leading WordPress hosting.
If you’re ready to migrate your WordPress site to WP Engine, all you have to do is choose a web hosting plan and follow our guide on how to use our WordPress migration plugin!
WordPress Migration FAQ
How long does a WordPress migration take?
The time it takes to migrate a WordPress site can vary. A straightforward migration might take 1 to 4 hours, but larger or more complex sites could take several hours or even a day or two. DNS propagation after changing your DNS settings can take up to 48-72 hours to fully complete worldwide.
Will migrating my WordPress site affect my SEO?
A WordPress migration can temporarily affect SEO, especially if you change your domain name or URL structures. However, if you transfer WordPress site to a new host while keeping the same domain and URL structure, the impact is usually minimal. Proper planning, using 301 redirects for any changed URLs, and informing Google about the move (if applicable) can help preserve your search rankings. Migrating to a faster host can even improve SEO in the long run.
Do I need to transfer my email accounts separately?
Yes, email hosting is often separate from website hosting. If your email accounts are tied to your old hosting provider, you’ll likely need to migrate them to your new host or a dedicated email provider. This process typically involves backing up your emails and configuring them on the new server. Check with both your old and new hosting providers for specific instructions on email migration, as this is not usually part of the standard WordPress migration process.
What are common WordPress migration errors and how to troubleshoot them?
Common issues include “Error Establishing a Database Connection” (check wp-config.php details and database credentials), 500 Internal Server Errors (often .htaccess issues or PHP memory limits), broken links or images (check file paths and run a search-replace for old URLs if necessary), and plugin conflicts. Ensure your new server meets PHP and MySQL requirements. If a migration plugin fails, check for connection errors or size limits. Thoroughly testing your site on the new server before going live is key to catching and fixing these problems.
What should I test after my WordPress migration is complete?
After you migrate WordPress to new server, conduct thorough testing:
– Check all pages, posts, and links for proper loading and formatting.
– Test website functionality: forms, comments, user logins, shopping cart/checkout (if applicable).
– Verify that images and media are displaying correctly.
– Ensure your SSL certificate is active on the new host.
– Check site speed and performance.
– Confirm that backend functionality (e.g., plugin settings, admin dashboard) is working.
– Ensure search engines can index your site (check robots.txt and Google Search Console).
– Monitor for 404 errors.