Emulate DNS Locally with the Hosts File Trick
NOTICE
The hosts file trick works with the WP Engine legacy network by default. The hosts file trick may work with the Advanced Network or Global Edge Security networks if the domain has already been pre-verified by Cloudflare.
Did you know you can test your site on WP Engine after migrating without changing your DNS, just by editing a file on your computer?
When you visit a website your computer saves the server IP address of the domain in the “hosts file”. This speeds up the connection time the next time you request the website from that computer, because it already knows where to look.
By modifying this file, you can trick your local computer into thinking that a domain lives at a different IP address than is actually configured with the DNS host. Best of all, the change is local to your machine only. Meaning no one sees the change but you, and it can be reverted just as easily once you’re done testing.
Locate WP Engine IP
In order to point your domain to WP Engine on your local machine, you will need to know your WP Engine IP address. To find your IP address:
- Log in to the User Portal
- Select the environment name
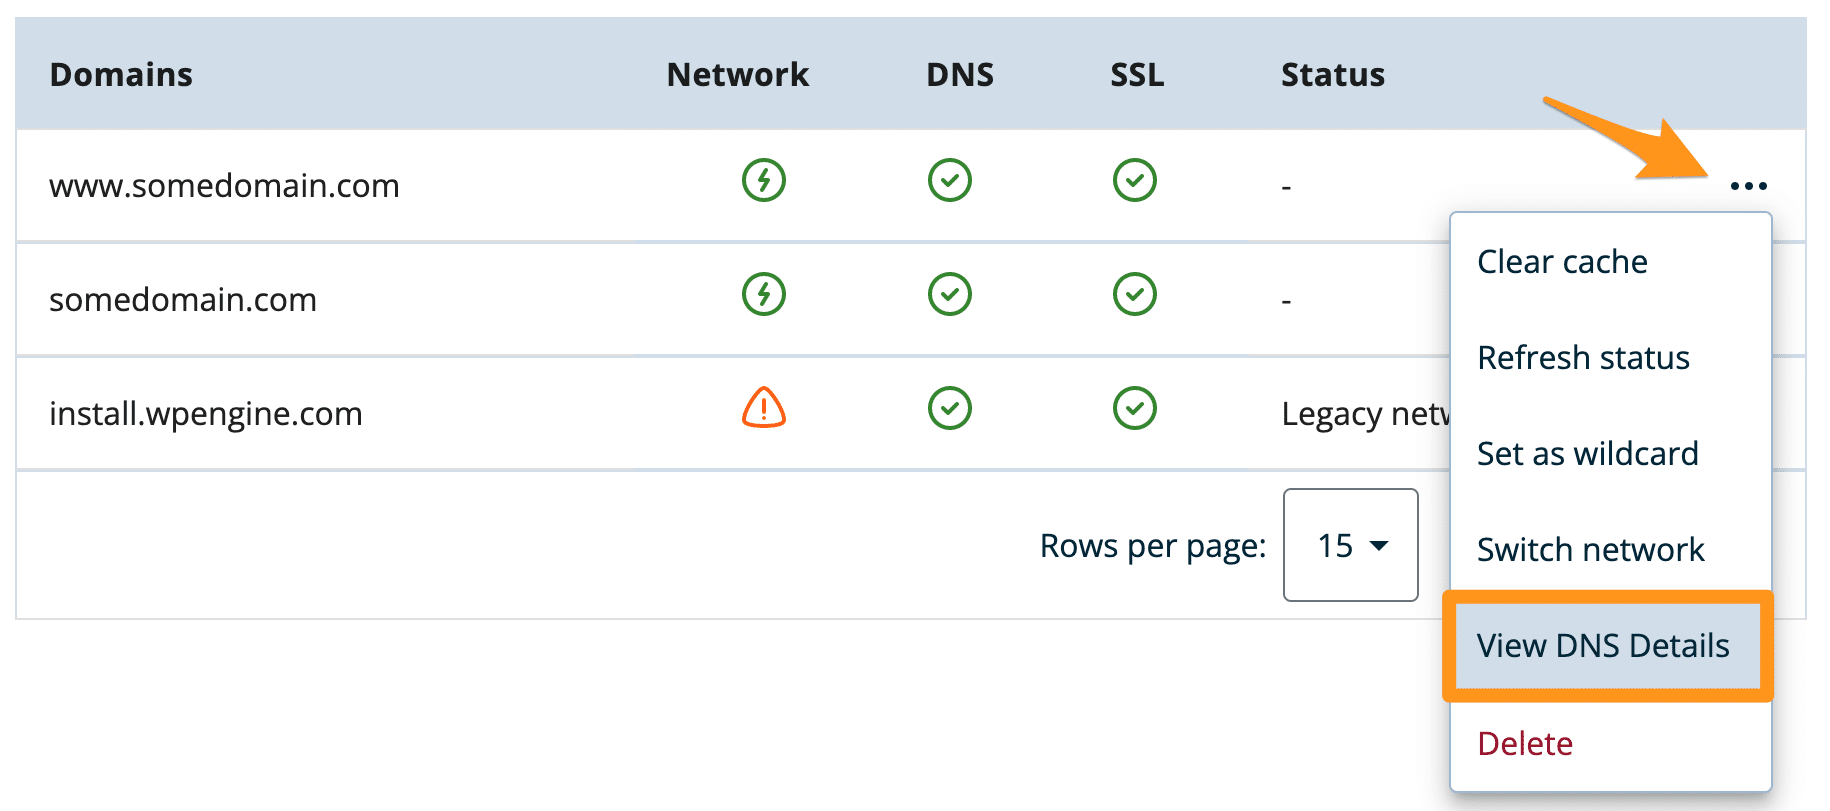
- Click Domains
- Next to the domain, open the three dot menu icon
- Click View DNS details
WP Engine provides two IP addresses. When testing with the hosts file either IP shown may be used.

Edit Hosts File
Edit the hosts file so that the domain name directly corresponds to the WP Engine IP on the same line. Add a new line to the local hosts section of the host file with the format of: ipaddress domain.com
For example: IP is 123.456.78.90 and the domain is mycooldomain.com
Therefore, add the following line to the hosts file:
123.456.78.90 mycooldomain.com
The steps to editing the hosts file will vary depending on whether you run a PC or a Mac, and also on the version of your operating system. Because of the variations and since there is already good documentation on how to edit the hosts file, we’ve compiled a set of external resources, one of which will fit your particular operating system.
Windows operating systems
Mac operating systems
Windows Documentation
Windows includes a utility called Hosts File Editor Utility, which makes it easy to manage custom host IPs in a user interface.
Learn more about using this utility on Microsoft’s website.
Mac OS X Documentation
On a Mac, there are two helpful tools for editing your hosts file called iHosts and Gas Mask. These applications help you easily manage multiple hosts file entries and edit without entering Terminal or using command line.
Flush DNS
Last, you will need to flush the DNS cache on your machine so it knows to read the new entries in your hosts file instead of the old, saved entries. On many devices restarting will clear this cache, however to ensure the changes are being observed, we recommend following the steps to manually flush your DNS cache.
Steps to flush DNS will vary based on the Operating System of your computer. We have included videos of each below.
Windows 10
Windows 8
Mac OSX
Relaunch Browser
In order for the hosts file settings to take effect, please restart your web browser completely. You can now access your website hosted by WP Engine using the domain name as normal in your browser.
To revert the changes, simply delete the line added to your host file, or comment it out. Then flush DNS and restart your browser.
NEXT STEP: Going live with a domain on WP Engine
