ElasticSearch Powered by ElasticPress.io
Searching and requesting information from the database can be a burdensome load for even the most optimized web server. Offloading search functionality to an external server that’s specializing in handling those searches will help speed up your WordPress® site and get the best performance out of your server’s resources.1
We recommend the ElasticPress plugin along with ElasticPress.io as your search host to offload your website’s search workload. The service also includes many helpful features to improve your search functionality even further, such as spellcheck and geolocation.
ElasticPress Plugin
- Log in to your WordPress admin
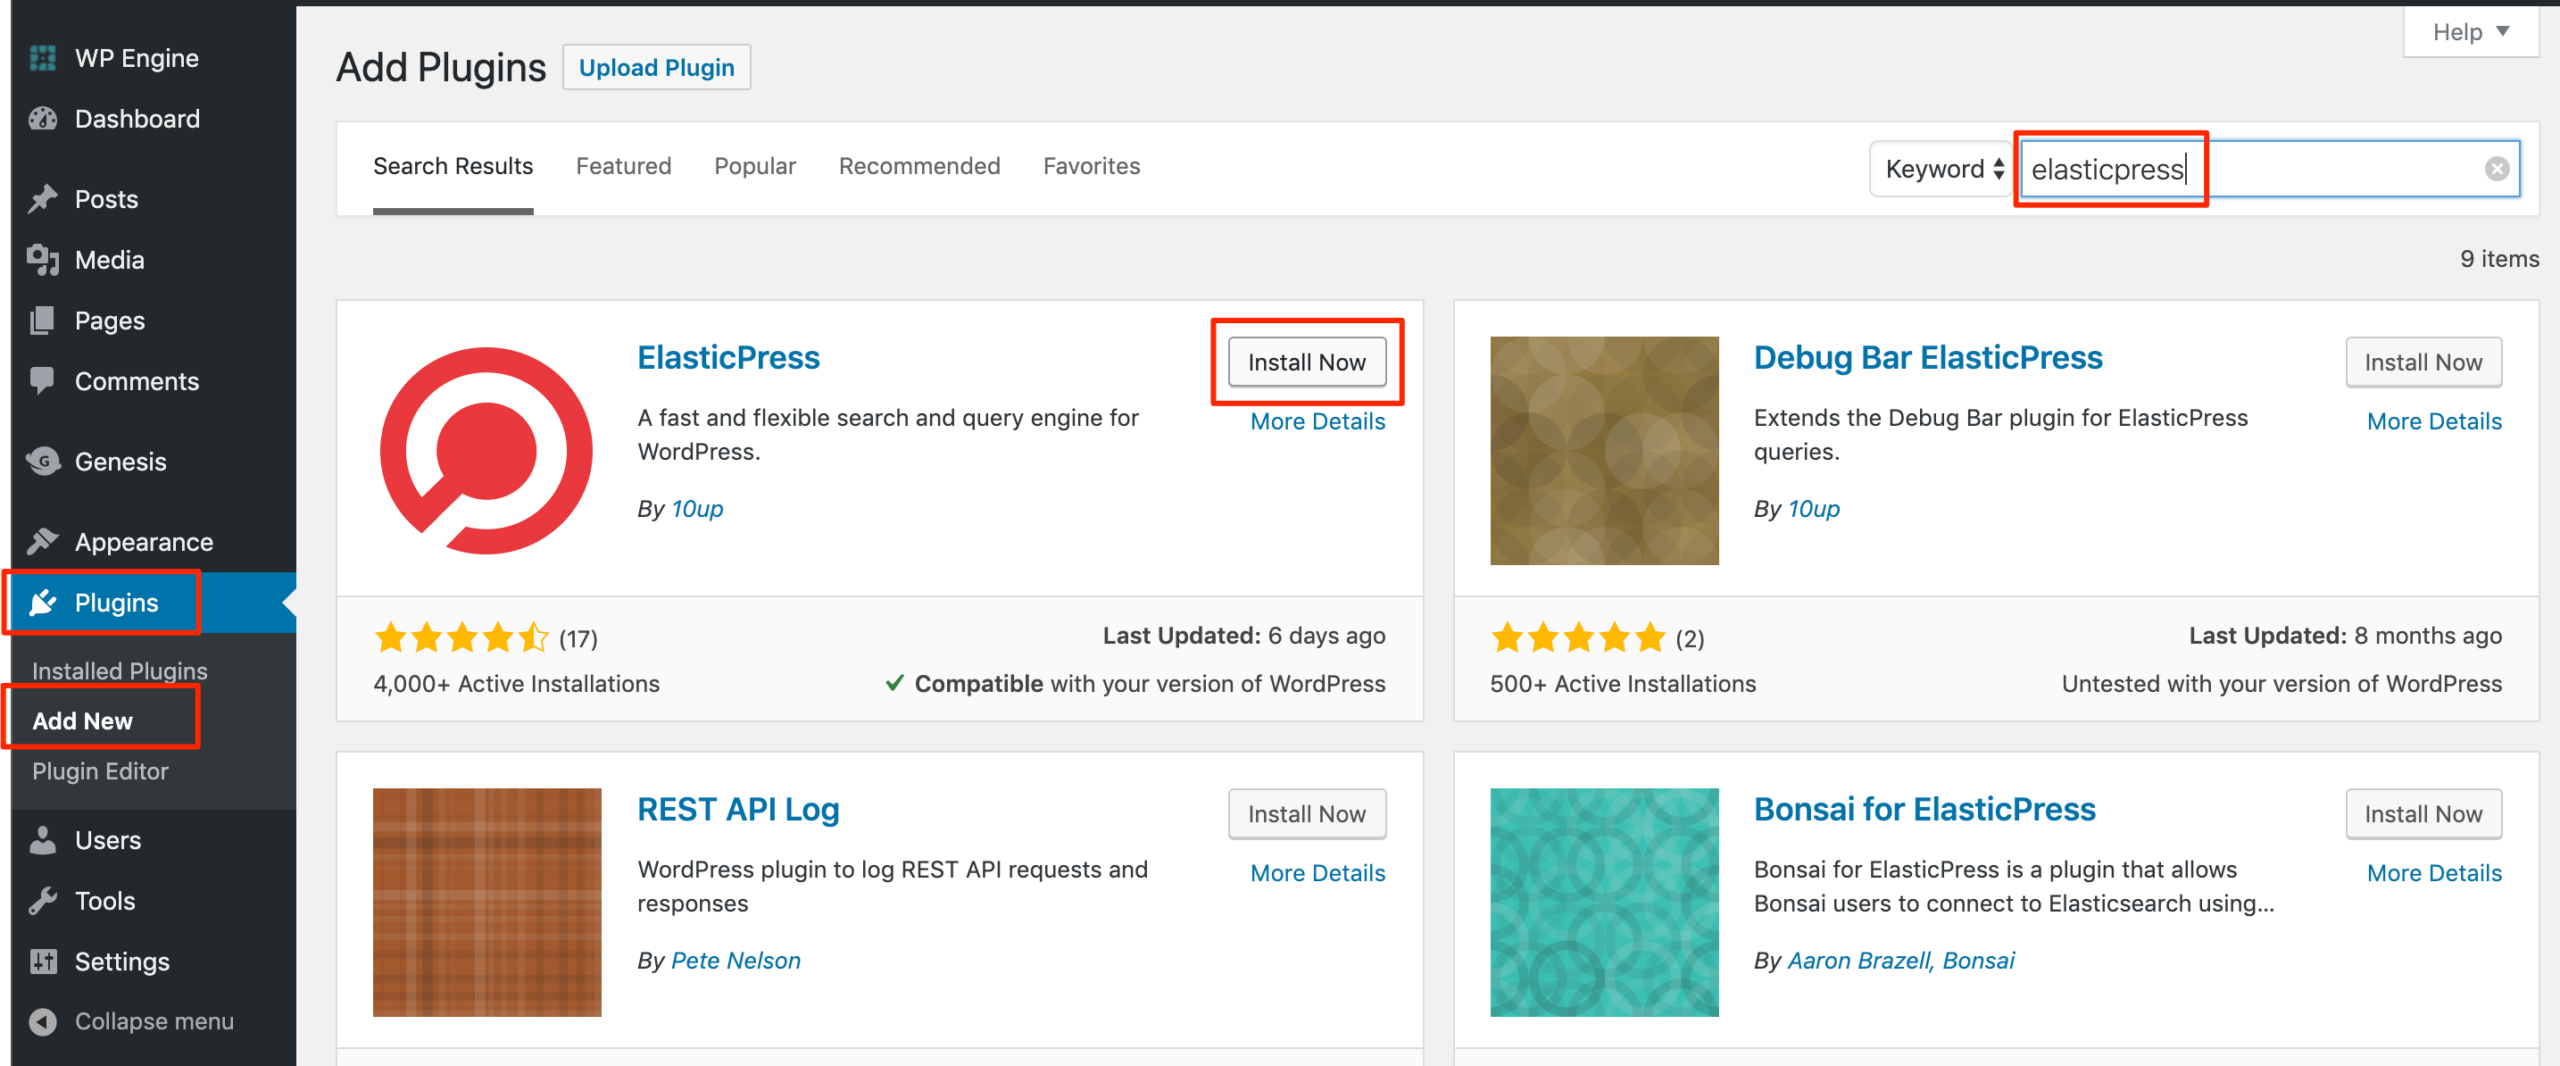
- Click Plugins
- Click Add New
- Search for elasticpress
- Click Install Now
- Click Activate
NOTE
If you prefer to install plugins using SFTP, the ElasticPress plugin can be found here.
Find a Search Host and Generate API Credentials
The next step is to obtain a search host to offload the search functionality on. These servers are optimized by their host specifically to handle your website’s intense database queries.
In this article we’re using ElasticPress.io, which includes extra search features, such as search by metadata, spellcheck and fuzzy searching, and multisite support.
- Choose a plan that suits your needs and create an account
- You can sign up for ElasticPress.io here
- Click My Account
- Select My Subscription
- Locate the Credentials for your account
- Leave this page open for use in the next step

Connect ElasticPress Plugin to Search Hosting
- Open your WordPress admin dashboard (wp-admin)
- Click ElasticPress in the menu
- Select Settings
- Select ElasticPress.io
- Copy and paste the following credentials from your ElasticPress.io dashboard
- ElasticPress.io Host URL
- Subscription ID
- Subscription Username
- In the ElasticPress.io dashboard, click Change Token to generate a Subscription Token
- This token cannot be viewed again once you have navigated away from the page, so be sure to copy it down
- Click I Understand to confirm that any previous token in use will be invalidated
- Copy and paste the token into the ElasticPress plugin settings field called Subscription Token
- Click Save Changes

NOTE
If you are on an eCommerce plan that includes Instant Store Search and the plugin is still asking you to input the 10up details, delete the plugin, deactivate Elasticsearch, and then reactivate it from the User Portal.
Index Your Content
- Open your WordPress admin dashboard
- Click ElasticPress
- Click Index Your Content
This process may take some time. Once it’s complete, you will be able to view settings to customize your search and view the health of your website’s search index all within the ElasticPress plugin.
Recommended Settings
ElasticPress has a large number of settings and can be highly customized. The team at ElasticPress.io has put together a list of which settings you should enable based on your website’s purpose.
eCommerce Store
- Required: Post Search, WooCommerce® 1
- Optional: Autosuggest, Protected Content, Documents
News Publisher
- Required: Post Search
- Optional: Autosuggest, Documents
Archival Site or Intranet
- Required: Post Search, Documents
- Optional: Autosuggest, Protected Content
For more information on these recommendations and about ElasticSearch settings check out the full guide here.
Getting Support
When reaching our for assistance with ElasticPress, there are a few things to keep in mind. If you have purchased your ElasticPress solution third-party, WP Engine Support is limited in how we can assist beyond basic troubleshooting, in many cases it may be best to reach out to the plugin or search host directly.
If you purchased Instant Store Search through WP Engine with an eCommerce Solution, please provide us with your ElasticPress Status Report when reaching out:
- From the wp-admin of your site
- Select ElasticPress from the menu
- Open Status Report
- Copy the report using the button at the top
Note
After February 2025, Instant Store Search will no longer be available for new or upgraded accounts. Instant Store Search will still work for accounts that can currently access it.
WP Engine Essential plans that cannot access Instant Store Search can still use ElasticPress by purchasing a 3rd-party license. WP Engine Core and Enterprise eCommerce plans will have access to use Smart Search AI.
NEXT STEP: Check out more tips to optimize your site